Build a Safari Rack
Posted: Thu Sep 04, 2014 6:12 am
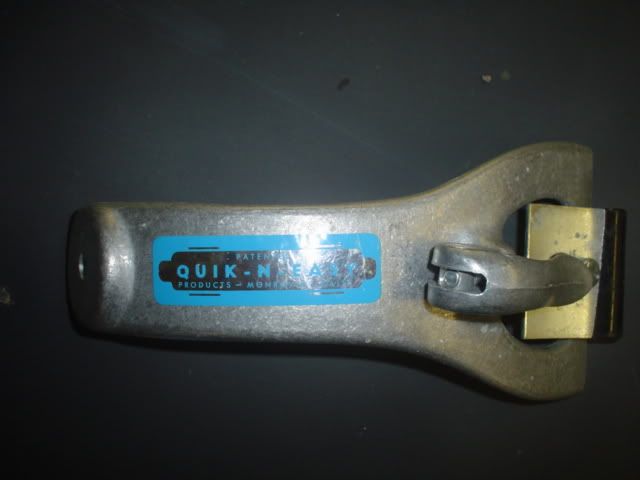
Racks are pretty popular in the vintage import scene and I've been looking for options for a while. The Yakima and Thule baskets are pretty pricey and so are the towers and bars for that matter. I ran across these universal cast aluminum stands on CL and picked them up for $40. I really like the idea of a platform for a DIY or custom rack. Since I'm not really into biking, snowboarding or kayaking, I went the basket route. These stands make it pretty easy to create whatever you want. It's something I can throw on for a trip or show then take it off and hang it on the wall when not in use. Here's a link with more info and specs.
http://www.nrsweb.com/shop/product.asp? ... eptid=1379
Since I had some plywood and steel hanging around, I was only into the whole shebang around $60. Kind of a fun way to kill a Sunday afternoon.
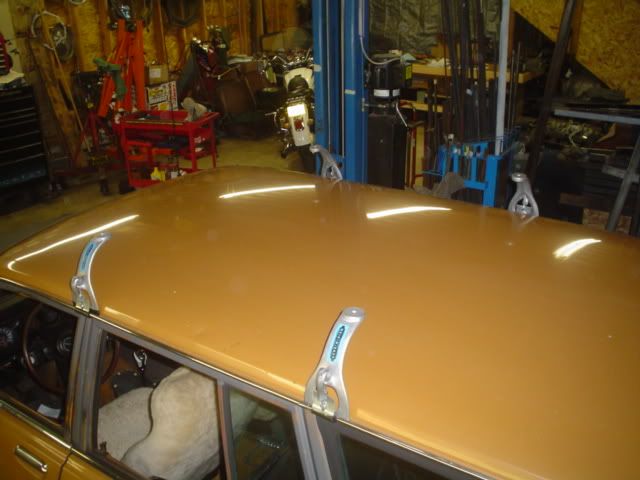
Starting with the towers, I played with placement and took some base measurements. I settled on a 40"X48"X4" overall dimension.
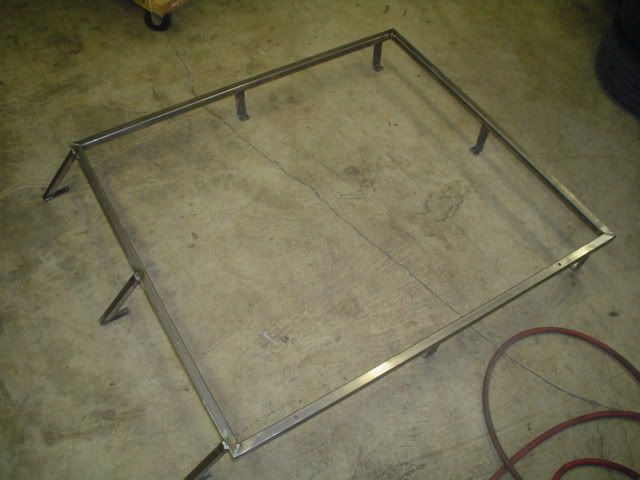
I grabbed 2 sticks of 1" square tubing and started cutting and welding.
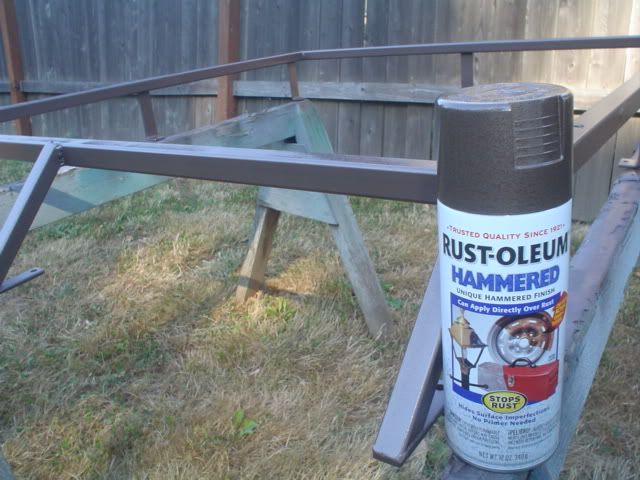
A couple quick coats of hammered finish paint. The color is pretty close to the wheels.
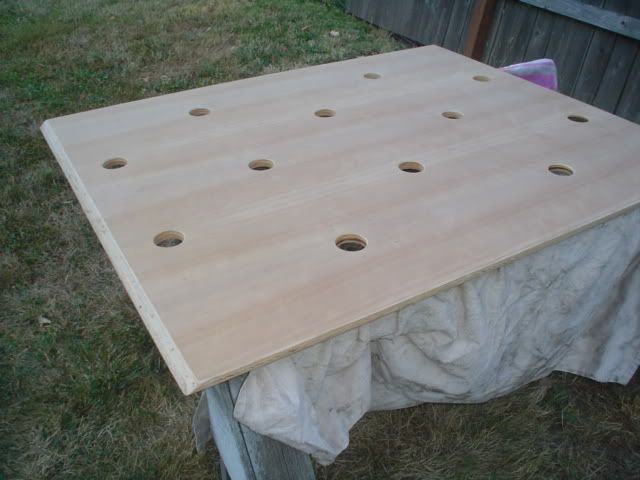
Phase two started out as a half-sheet of 3/4" plywood. This particular piece has been leaning in the corner of the shop for 8 years and is a furniture grade cherry finish. FANCY! I beveled all the edges and put a 45* edge on the front. To add some interest and give some hook points for bungees or rope, I put 12 2" holes in it. Then I sanded it up nice and purdy.

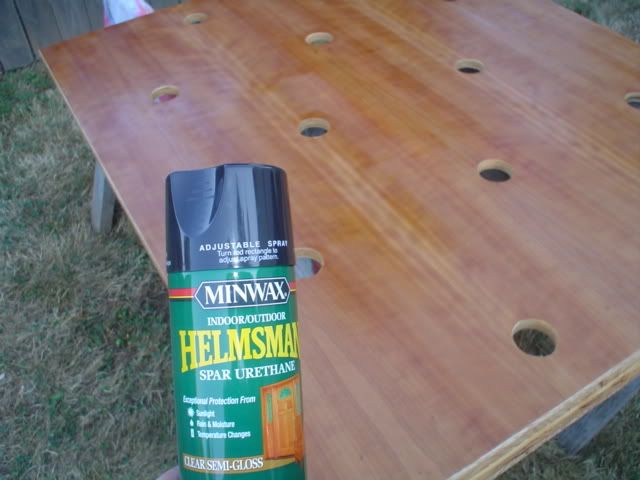
Three coats of spar varnish:
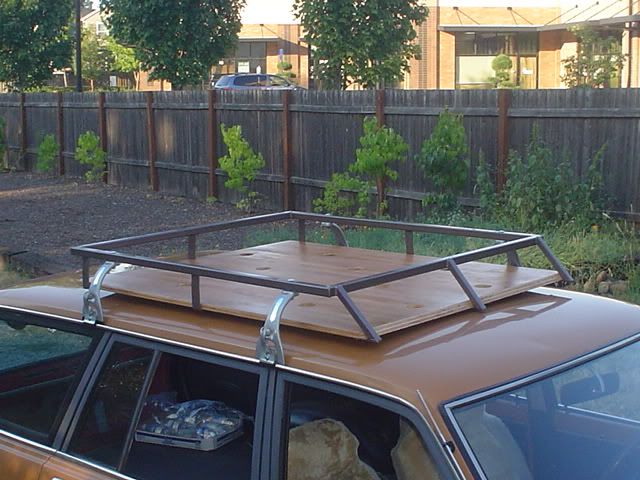
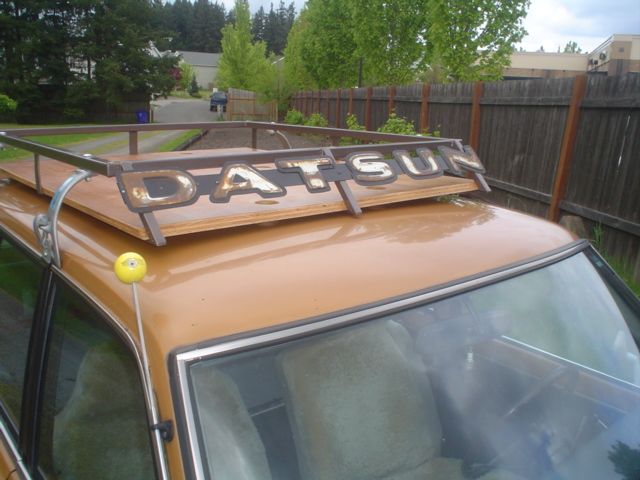
All assembled and on the car...
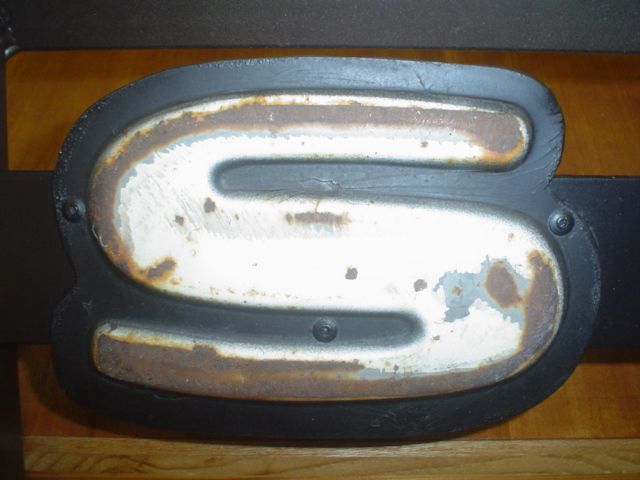
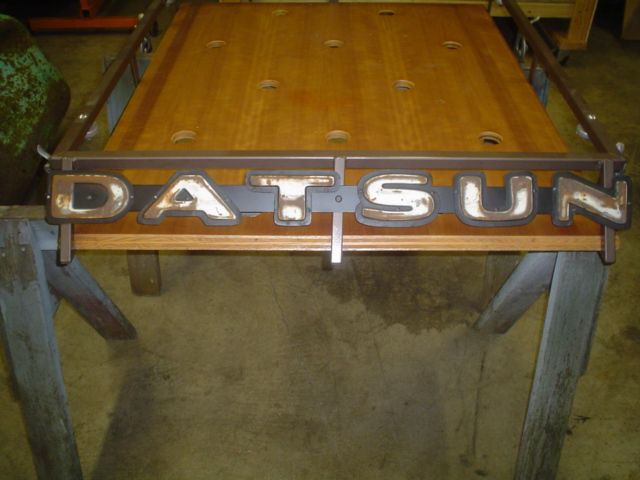
Finally got around to putting a cowl/deflector on my roof rack. I used an old, rough, rusty tailgate for my letter source. It was originally on my brother's green 521 but was sold to Jayden with a huge pile of parts a few years ago. I called to see if I could buy it back and he just donated it to the project. Anyway, I cut the tailgate into pieces, trimmed around the letters and riveted them to a strip of sheet metal. The sheet metal was then riveted to the frame of the rack. I wanted the rusty letters to "float" so I used some MagnaMask letters to save me from having to tape it all off, then shot it with flat black. The flash makes it look glossier than it really is.

http://www.nrsweb.com/shop/product.asp? ... eptid=1379
Since I had some plywood and steel hanging around, I was only into the whole shebang around $60. Kind of a fun way to kill a Sunday afternoon.
Starting with the towers, I played with placement and took some base measurements. I settled on a 40"X48"X4" overall dimension.
I grabbed 2 sticks of 1" square tubing and started cutting and welding.
A couple quick coats of hammered finish paint. The color is pretty close to the wheels.
Phase two started out as a half-sheet of 3/4" plywood. This particular piece has been leaning in the corner of the shop for 8 years and is a furniture grade cherry finish. FANCY! I beveled all the edges and put a 45* edge on the front. To add some interest and give some hook points for bungees or rope, I put 12 2" holes in it. Then I sanded it up nice and purdy.
Three coats of spar varnish:
All assembled and on the car...
Finally got around to putting a cowl/deflector on my roof rack. I used an old, rough, rusty tailgate for my letter source. It was originally on my brother's green 521 but was sold to Jayden with a huge pile of parts a few years ago. I called to see if I could buy it back and he just donated it to the project. Anyway, I cut the tailgate into pieces, trimmed around the letters and riveted them to a strip of sheet metal. The sheet metal was then riveted to the frame of the rack. I wanted the rusty letters to "float" so I used some MagnaMask letters to save me from having to tape it all off, then shot it with flat black. The flash makes it look glossier than it really is.
