Page 23 of 72
Re: Around Waynos house
Posted: Tue Apr 09, 2019 7:23 pm
by DRIVEN
It's really not too tough. I made one to mate a 71b to my Quad4 in my wagon.
Re: Around Waynos house
Posted: Tue Apr 09, 2019 8:31 pm
by wayno
I suppose I could move the starter/starter mount to a different place/position where the transmission case would not need modified, but again I would have to see if the transmission would even fit in a 320.
The only reason I have to do this is to see if it can be done, no one has ever mentioned the 71B when doing something like this, it's not really a small transmission, although there are a lot of them out there unlike the 60 series type that are hard to find now, but one day the 85/86 short shaft is going to be rare.
Re: Around Waynos house
Posted: Wed Apr 10, 2019 3:14 am
by DRIVEN
If it were me, I'd sell the 60 to an MG guy because they're likely to pay stupid money for it. Plus, I think it's on the weak side for a J15 in a pickup. 71 series would be safer, cheaper, more available. Fitment being the real wild card.
Re: Around Waynos house
Posted: Wed Apr 10, 2019 9:13 am
by wayno
Yea I planned on putting them transmissions on craigslist with MG Midget/MGB/MGA/MGTD/MGTF/Triumph typed in at the bottom, but them kits have changed over the years as these Datsun 210 transmissions are hard to find now, I believe they have switched there focus to a small ford 5spd transmission, but more than one outfit made them kits.
Re: Around Waynos house
Posted: Thu Apr 11, 2019 8:34 pm
by wayno
I almost had it, I was so close.
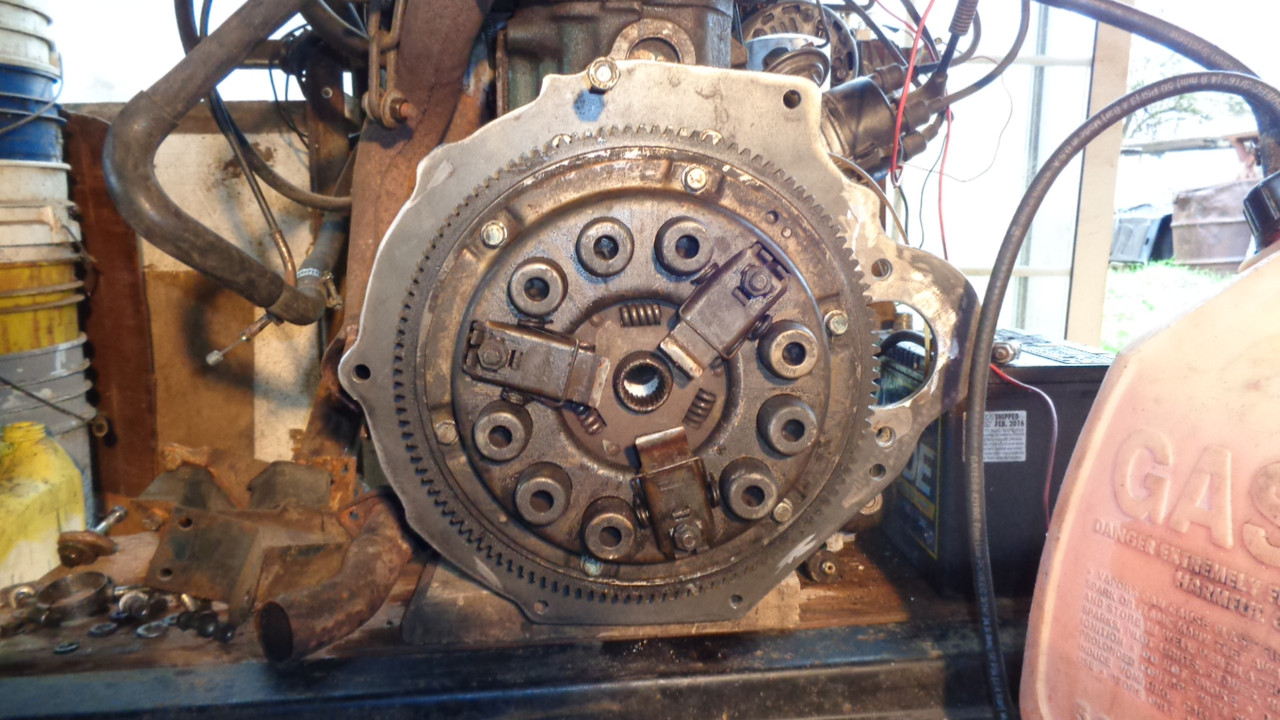
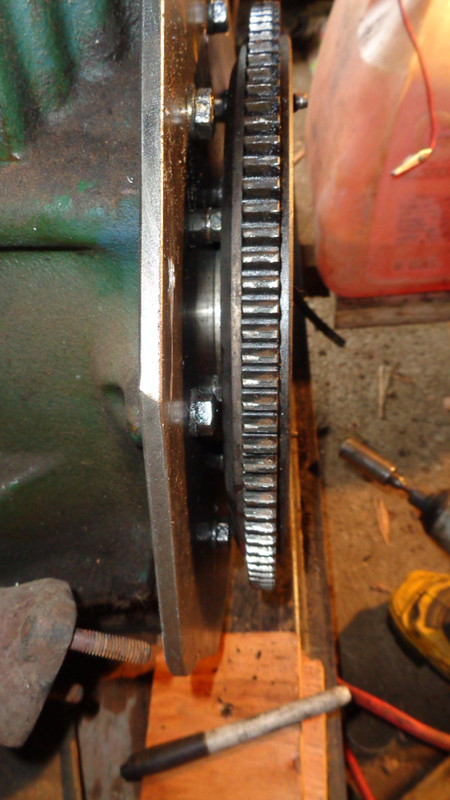
Plate bolted on
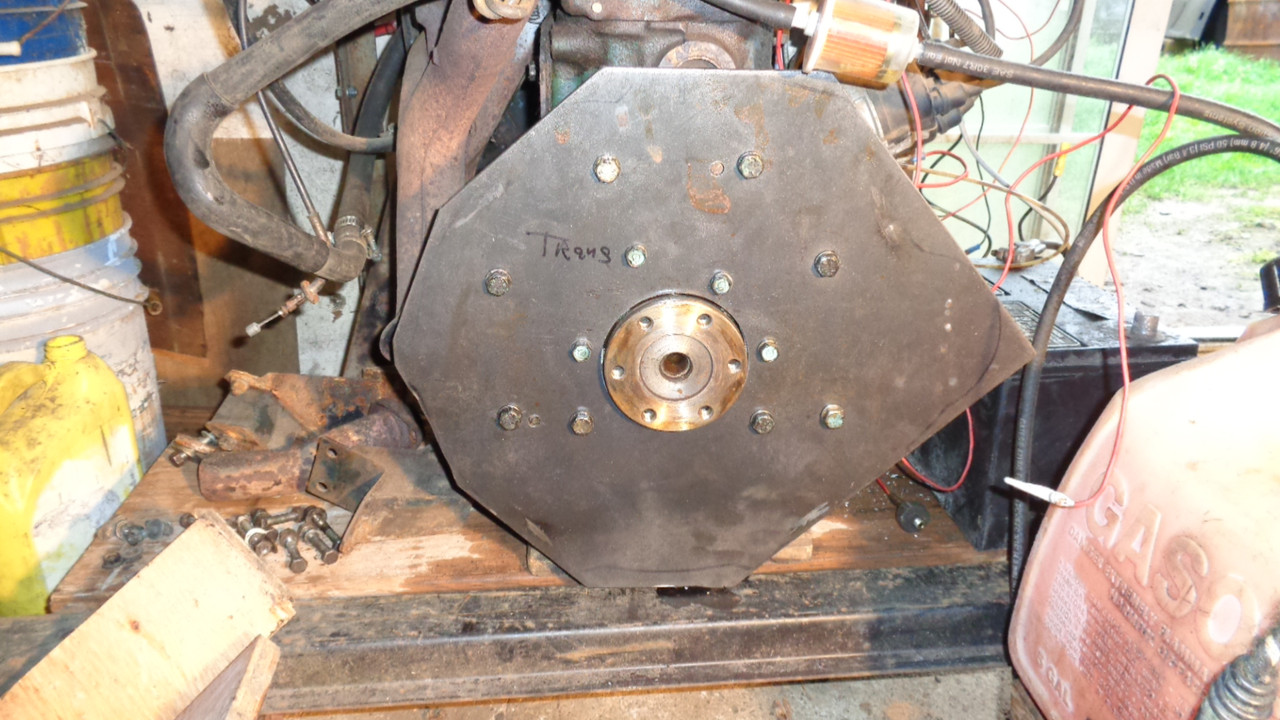
Flywheel on
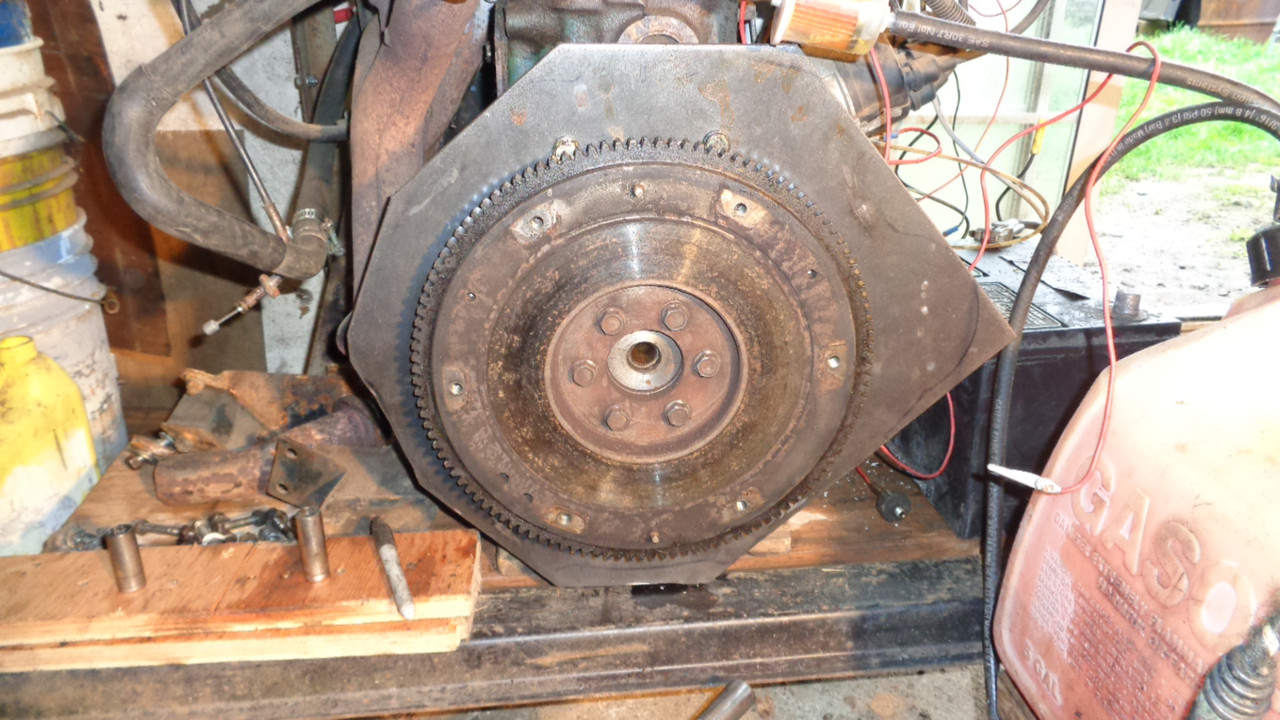
Kinda tight on back of the flywheel, but everything clears.
Starter hole and mount holes drilled.
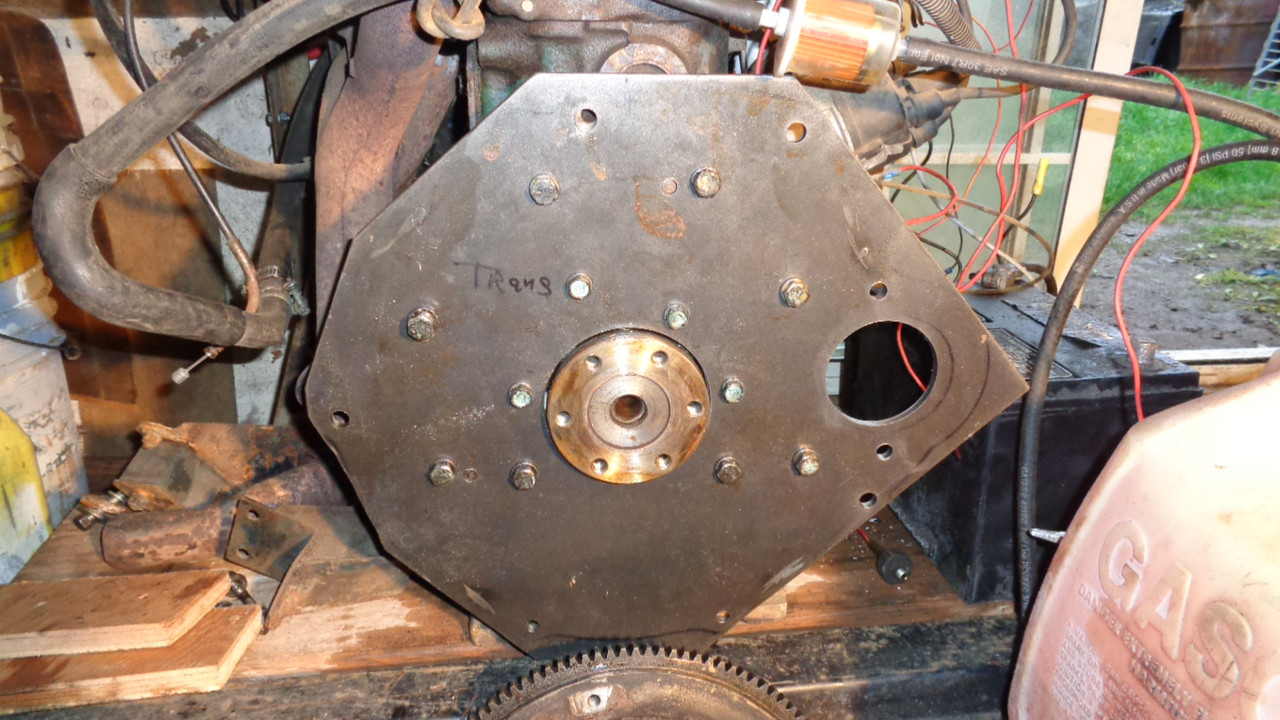
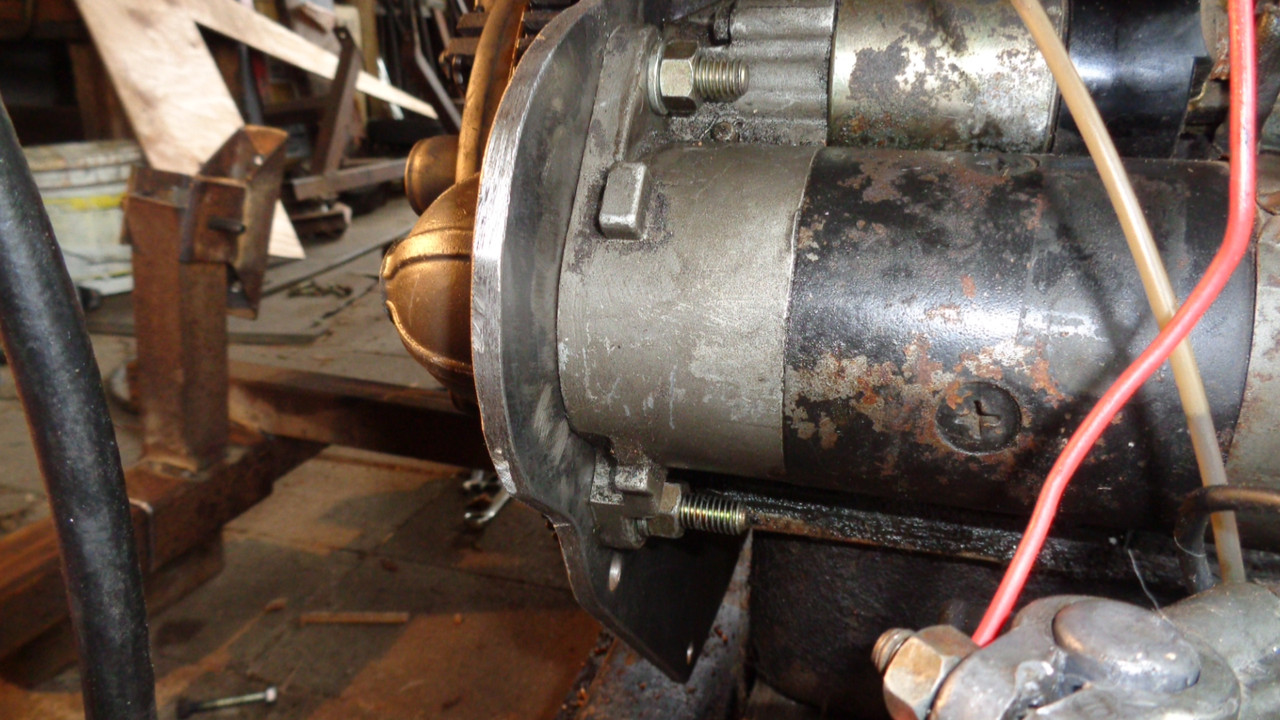
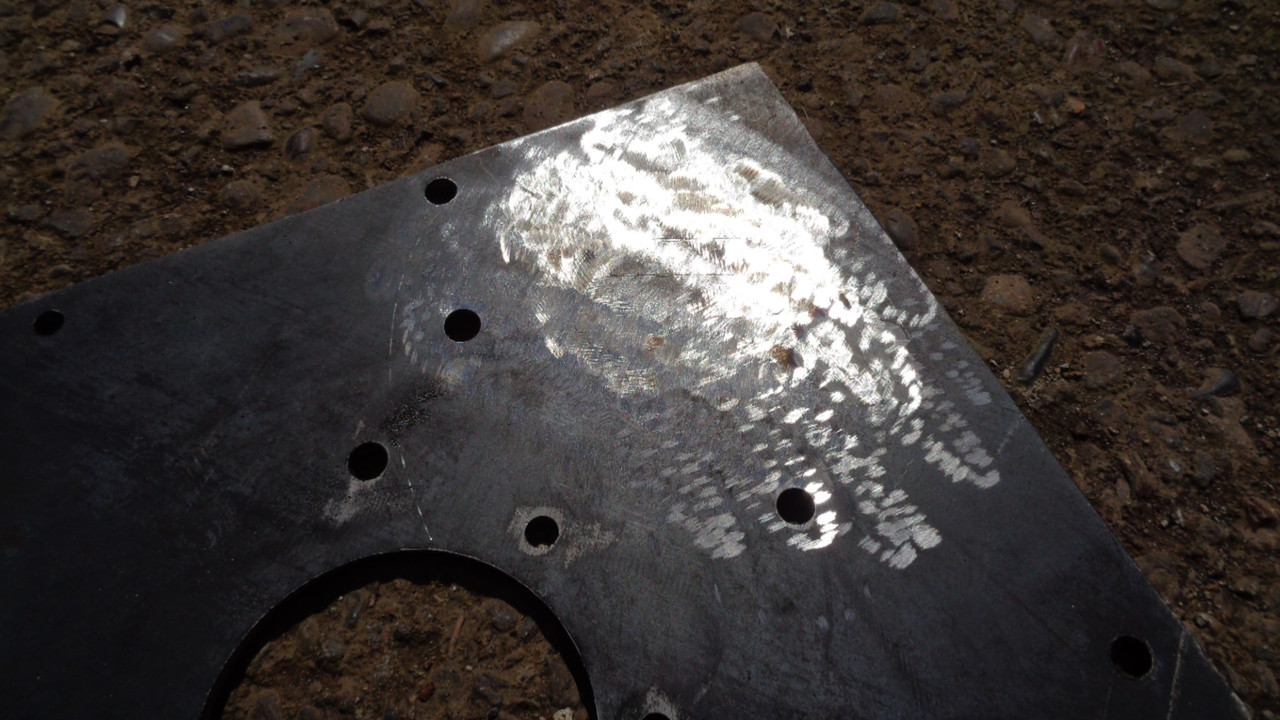
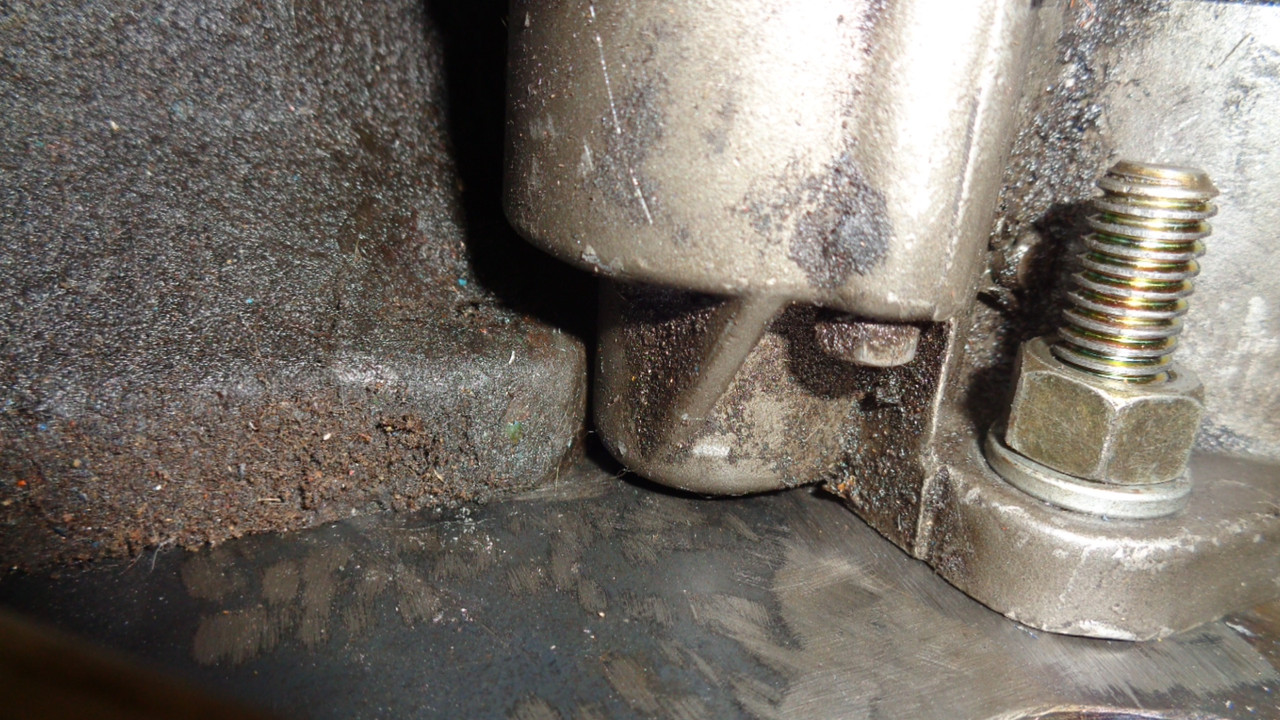
Unfortunately the starter hits the block in one spot when I try to twist the starter to align the mount holes, and it also hits the distributor, I can likely shave the block and likely get it mounted, I also have an electronic distributor that I can use that might work.
The issue is that I have to have the starter there, it's the only spot that the transmission don't need modified, the stock 320 starter doesn't work either, if I could some how re-clock the starter to put the solenoid sideways there would not be an issue.
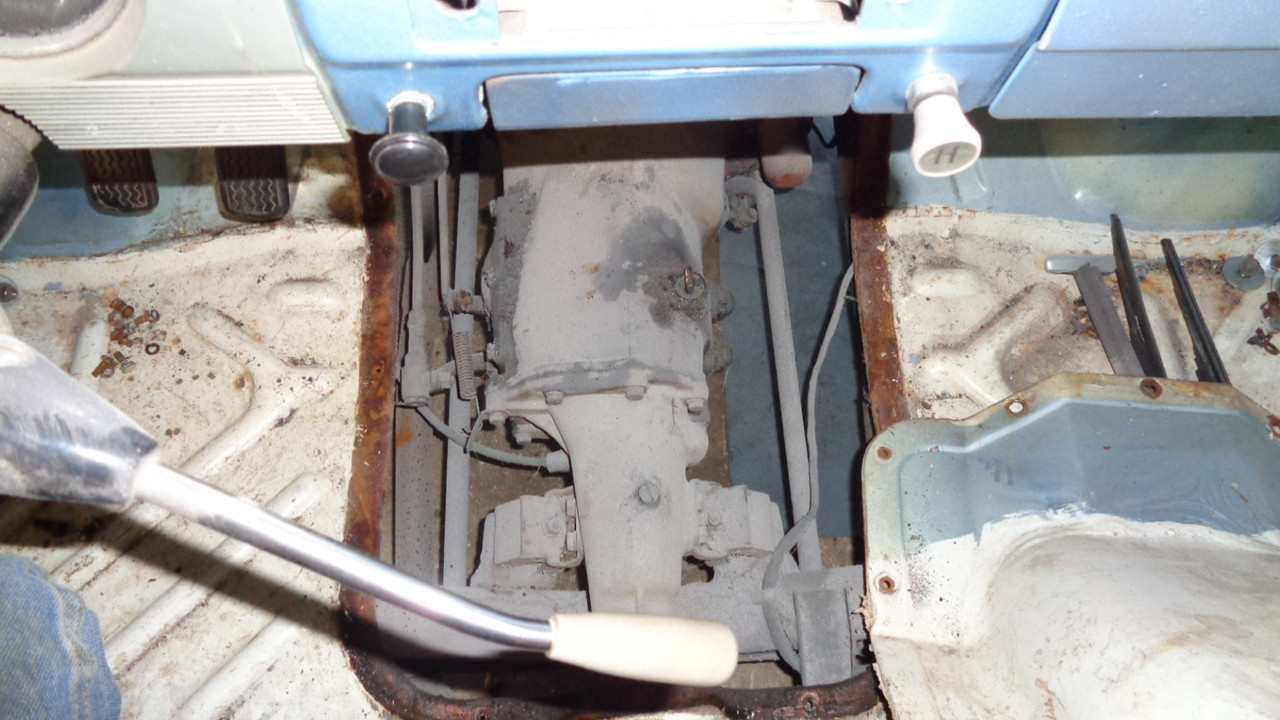
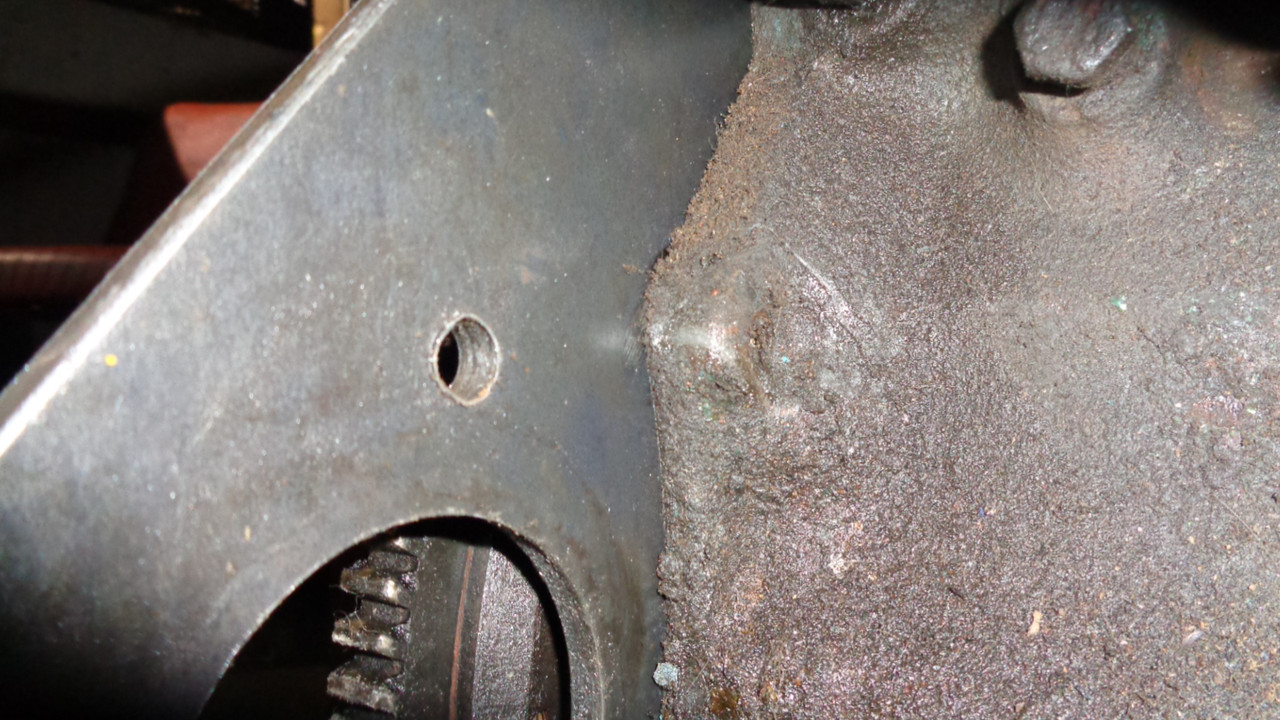
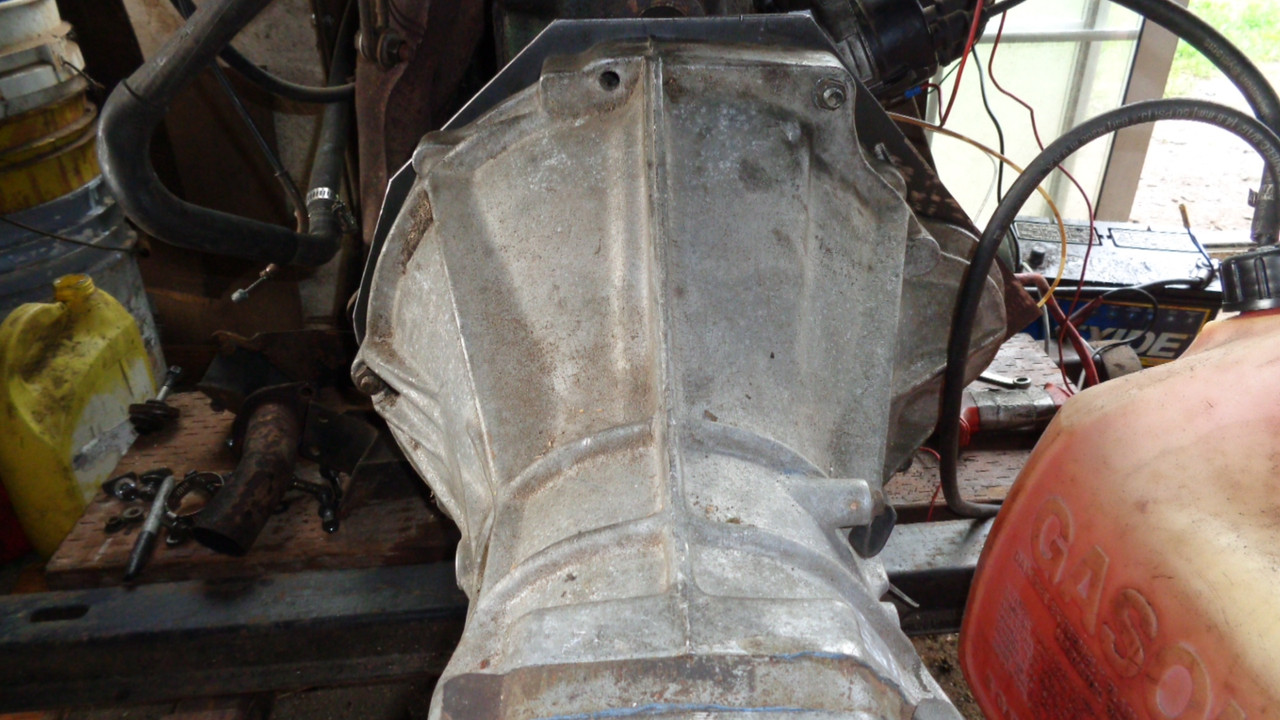
I might be able to take the end off the solenoid and put a relay on the fender well, I have done this on my work truck and it started fine, the turning starter shaft spun the gear into the flywheel teeth and when the engine started it spun the gear back to the rest position, I have a couple of these J series starters around here to play with, the starter solenoid is what is hitting the distributor, a 320 distributor clears the starter fine but I hate 320 distributors, maybe the stock J15 distributor will clear if I can get the starter clocked correctly, there is plenty of meat where it is hitting the block, you can see the shiny spot where it is hitting in the middle of the photo below.
Re: Around Waynos house
Posted: Thu Apr 11, 2019 9:13 pm
by DRIVEN
Any chance the nose cone can be rotated 180* so the solenoid is on the bottom?
Re: Around Waynos house
Posted: Thu Apr 11, 2019 9:50 pm
by wayno
The starter housing looks to be one piece to me.
If I can get it to rotate to where the mount holes align I can check the stock distributor for clearance again, I will get a better look behind the starter tomorrow when it is light outside, it got dark and I was a bit depressed, I tried an L block starter that was clocked great, but the end of the cone stopped at the flywheel, the little gear can't reach the flywheel, the cone is way too short on the L block starters.
I also might be able to use a 320 distributor mount, the part hitting the starter is what holds the distributor housing still/in position, the 320 mount is adjustable 360 degrees so I could cut off the part in the way on the base of the distributor.
Where to bolt is underneath in the part that sticks out and the condenser itself are the issue.
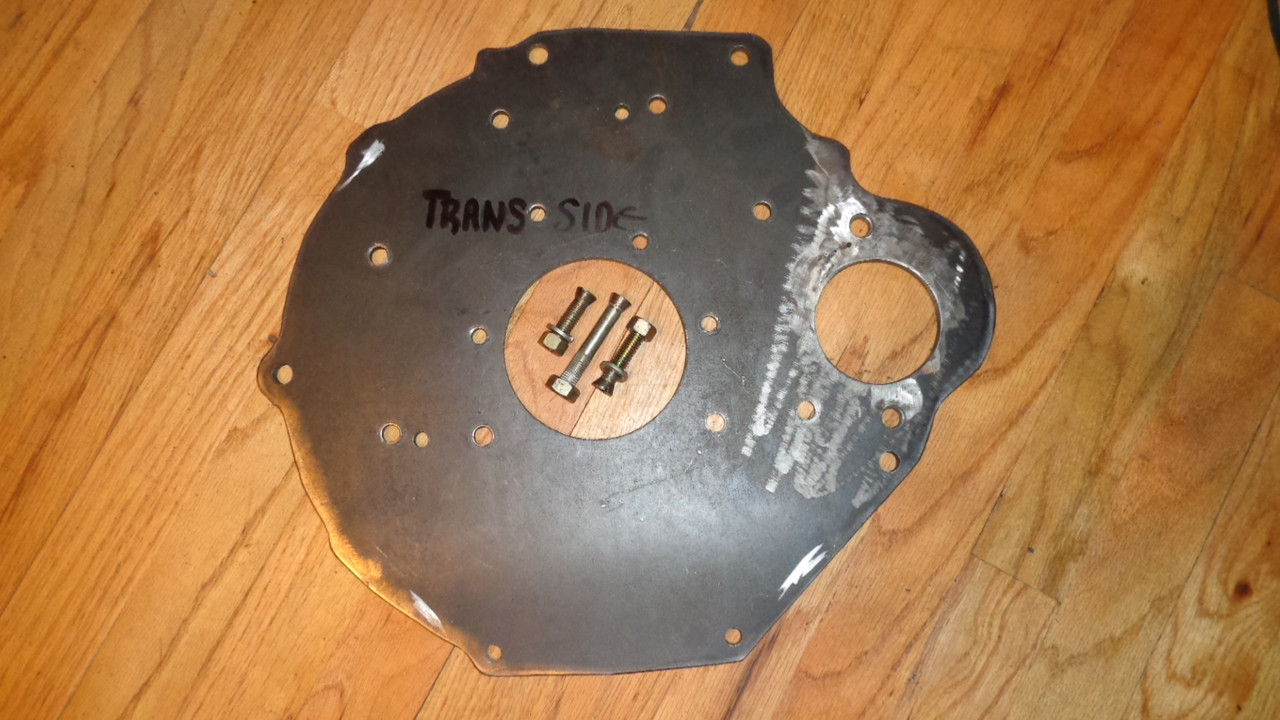
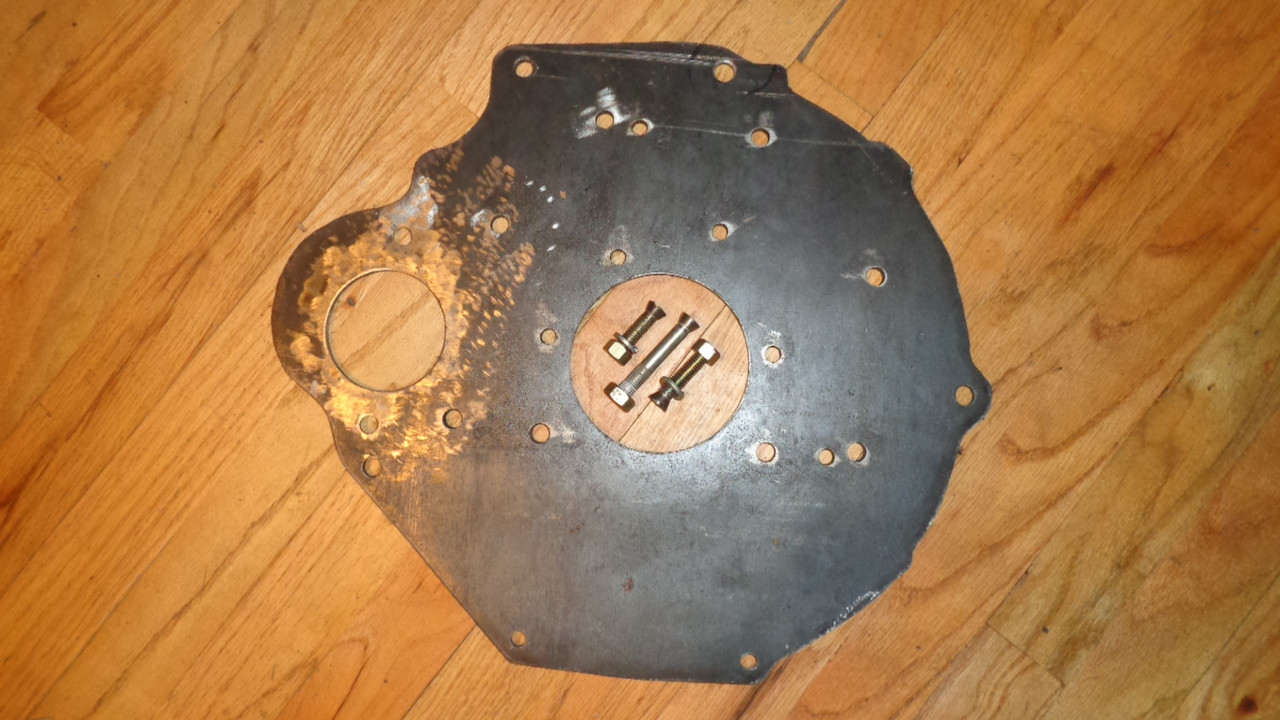
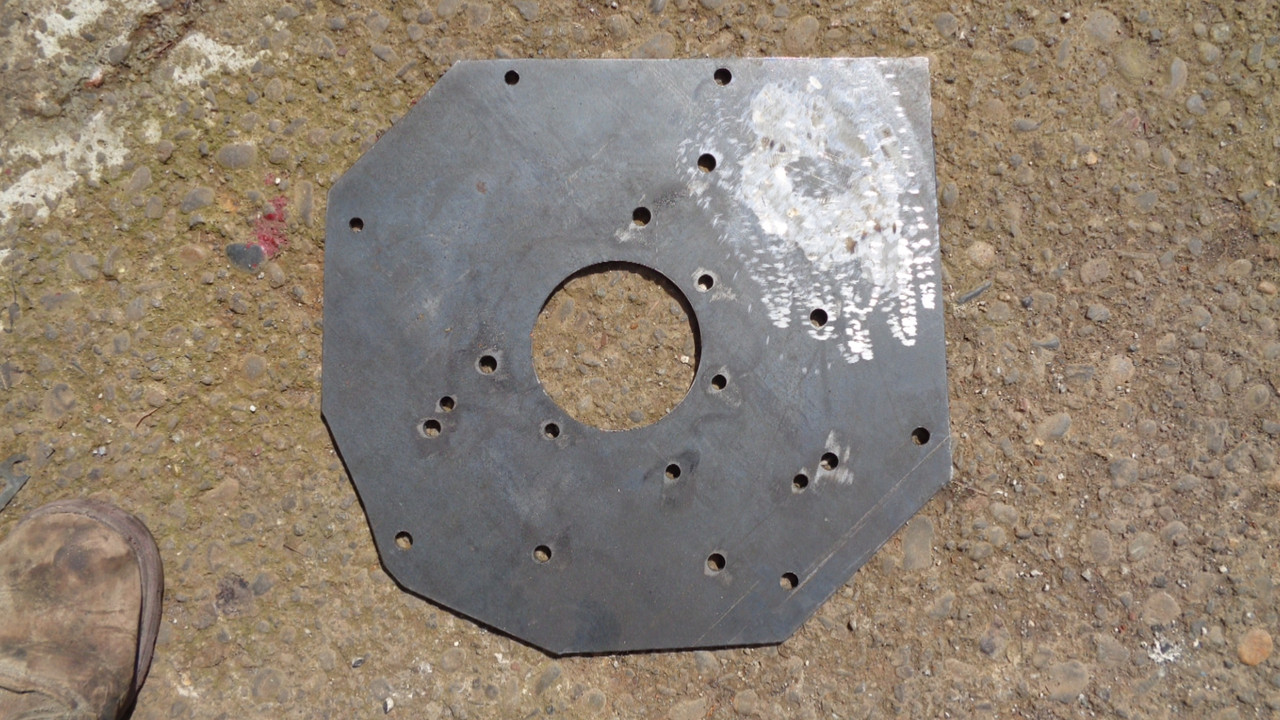
I will think about it tonight, it came to me last night in bed on how I could make the plate without having to measure out every hole, all I did was tack weld the original plate onto the plate and drill the holes using the existing holes I needed drilled, then I clamped the L block plate on at the correct angle and I drilled the transmission mount holes, then I traced where the starter hole needed to be and then used the original plate clocked correctly and drilled the starter holes, I bought 2 large bi-metal hole saws today(2 3/4" and 4"), the smaller one I will likely use in the future making exhaust flanges, the 4" I have no other use than what I did today.
Re: Around Waynos house
Posted: Fri Apr 12, 2019 4:49 am
by DRIVEN
Great progress.
I couldn't picture the starter in my head so I wasn't sure. Looks like the one you posted would be a no go. Hopefully you can get something else figured out.
This will be a pretty cool accomplishment if it all works out.
Re: Around Waynos house
Posted: Fri Apr 12, 2019 8:31 am
by wayno
The way I went into this was with the thought that it needed to be done without any major modifications, cutting away the block to make room for the starter is a major modification, I could weld up the mount holes on the plate and re-clock the starter, but that causes even a greater space issue with the distributor.
I cannot weld aluminum so cutting the cone of the starter and re-clocking it is out, I will have to work with what I have or find another starter that is clocked differently, maybe MG starter, but I am thinking they are like the early 320 starter and that will not work.
Re: Around Waynos house
Posted: Fri Apr 12, 2019 4:27 pm
by wayno
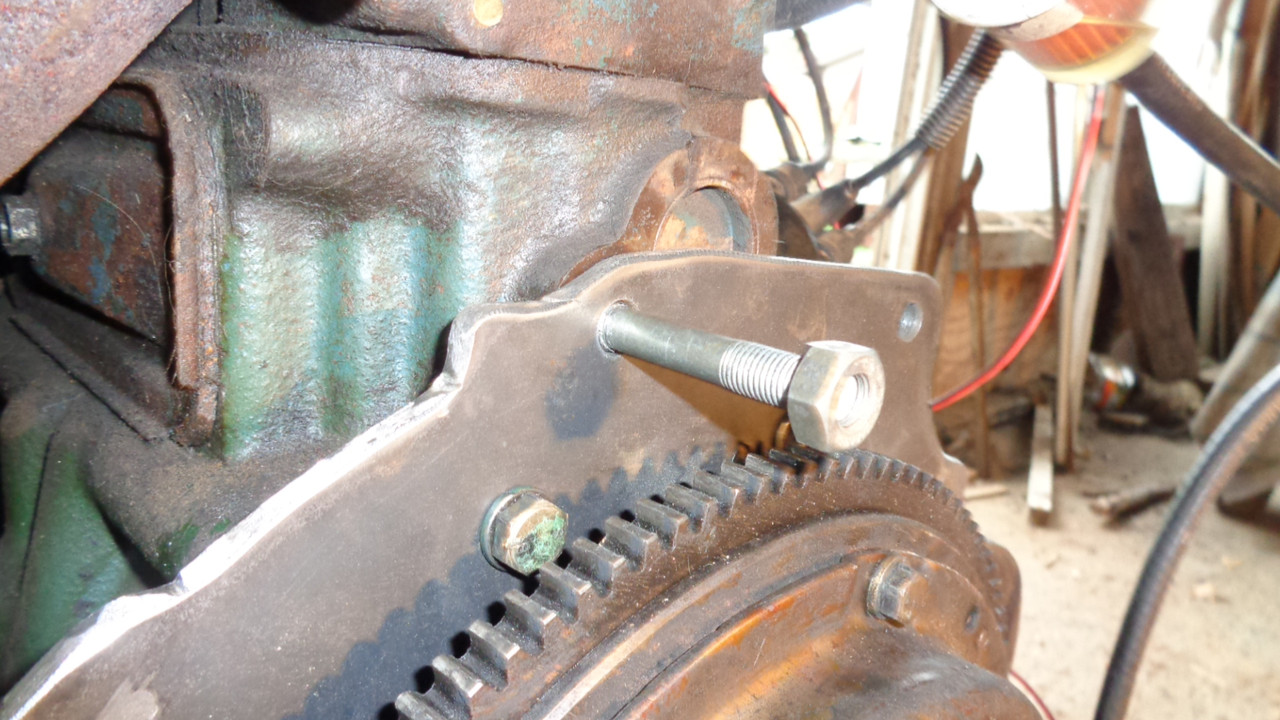
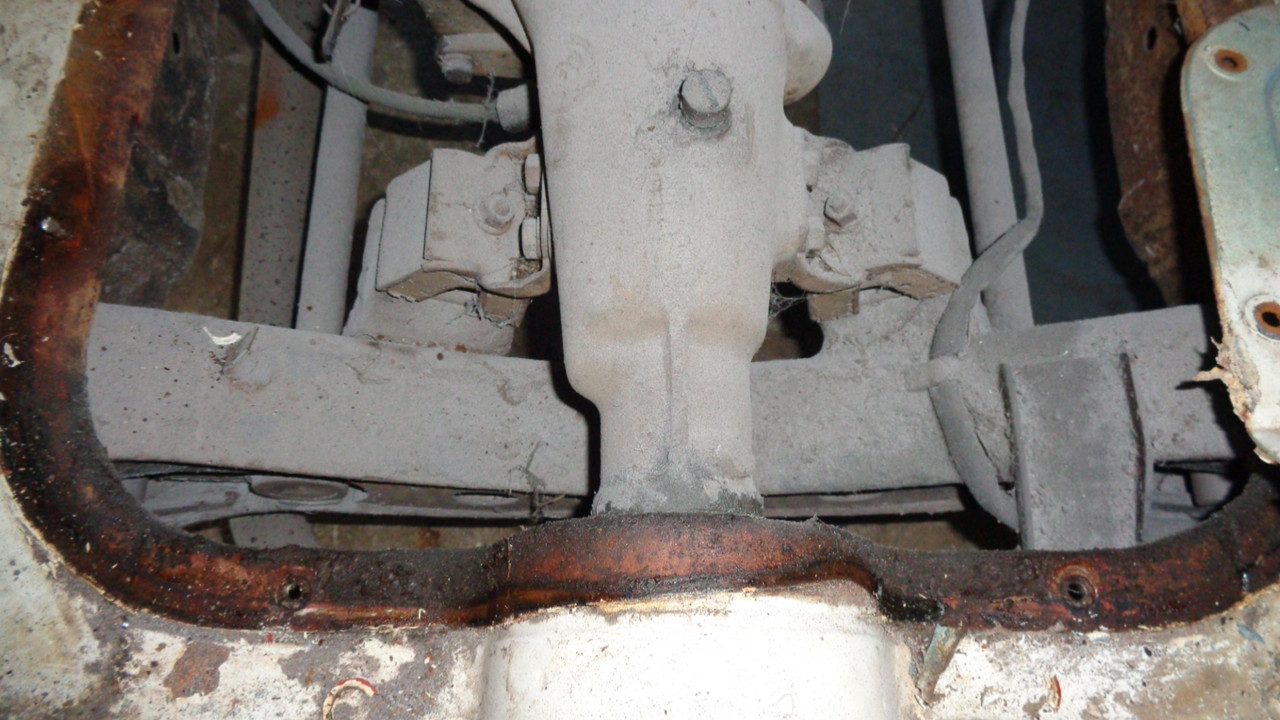
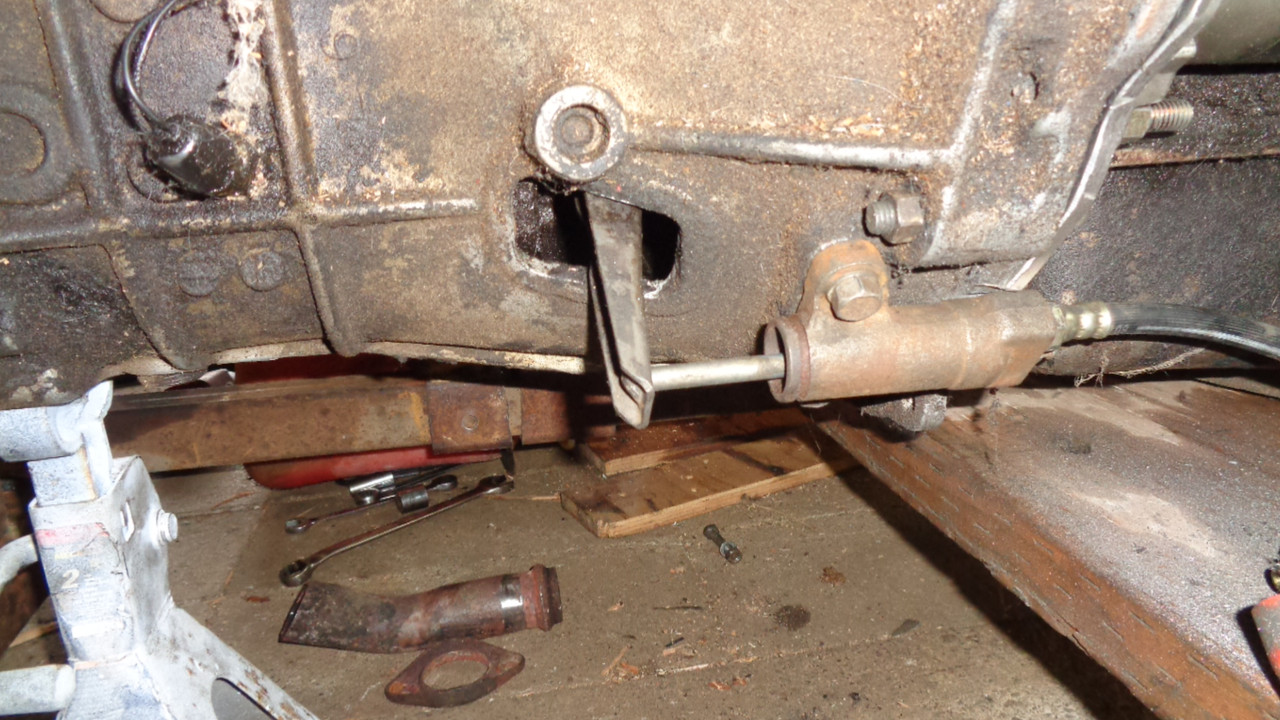
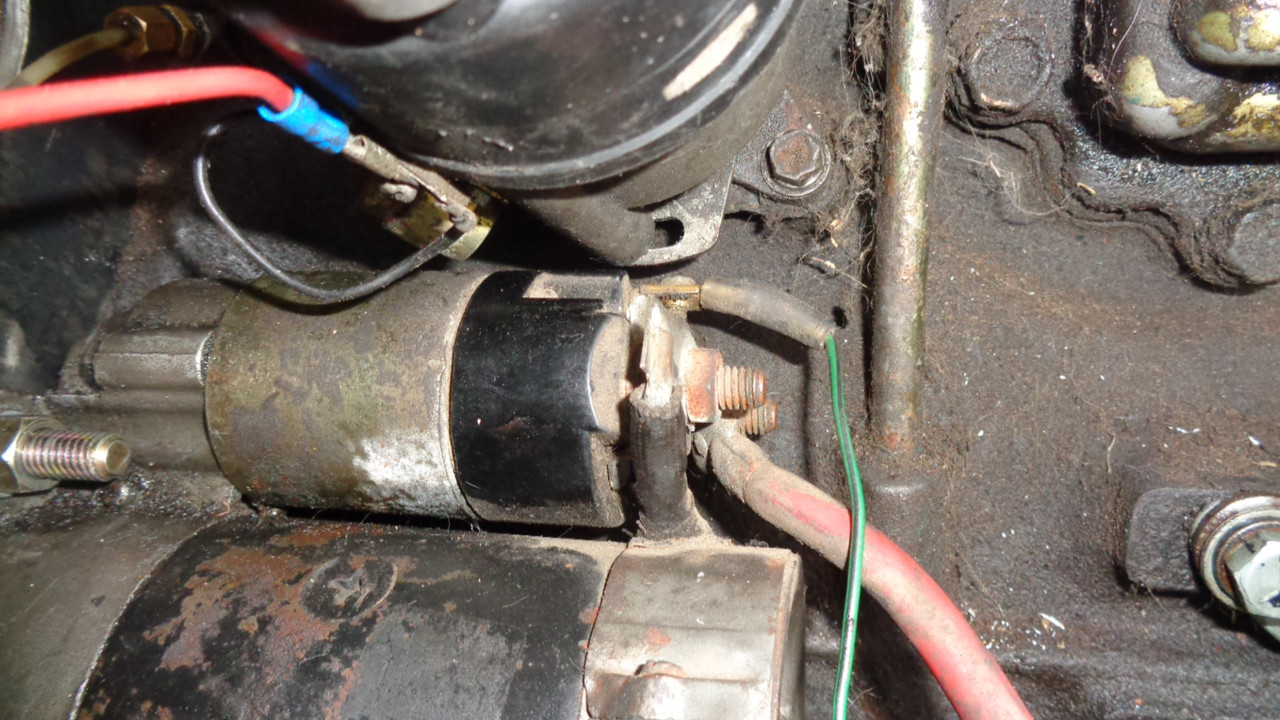
OK, so I decided to do this right, so I cut a piece of metal and filled the starter hole and starter mount holes.
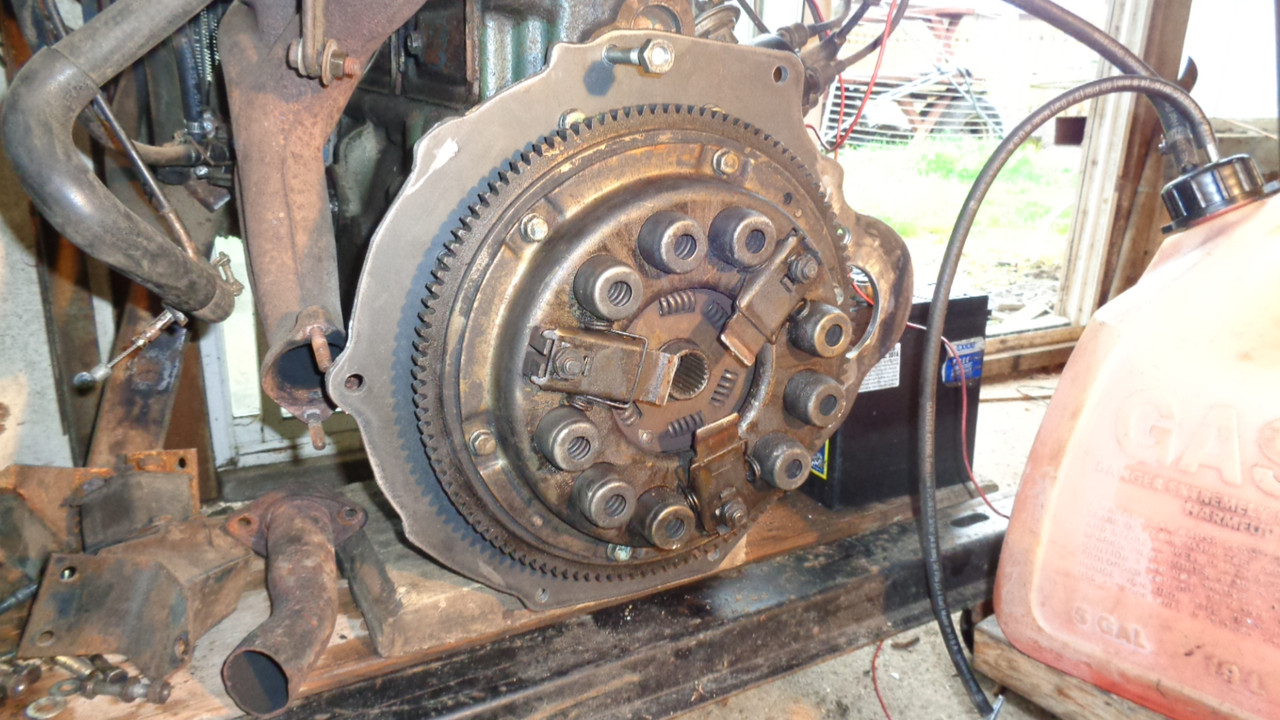
Then I took the plates and transmission case and figured out how low I could mount the starter without having issues inside the transmission case, I only had a little room to play with, but I did it, the stock distributor and starter are very close.
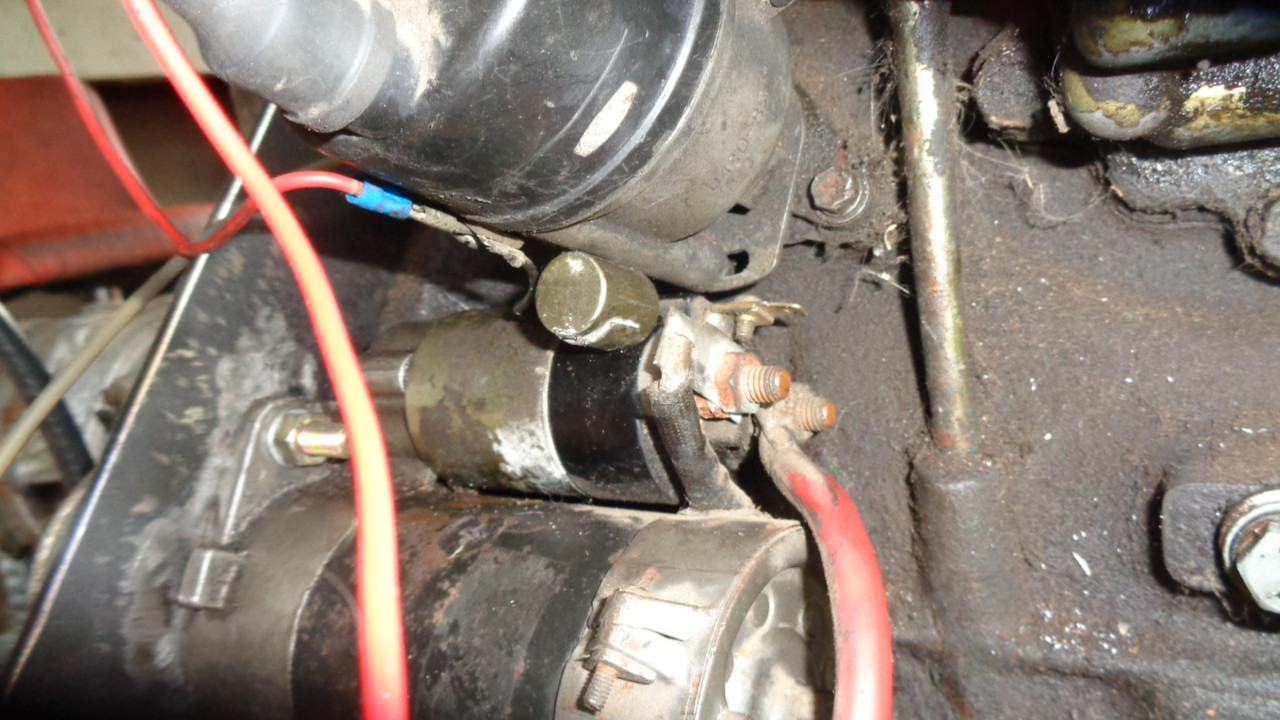

The starter is just low enough to not hit the block where it was hitting before, this was a "Hail Mary" and it worked out, it is freaking tight in a couple places and I would have gave up if it had not worked this time.
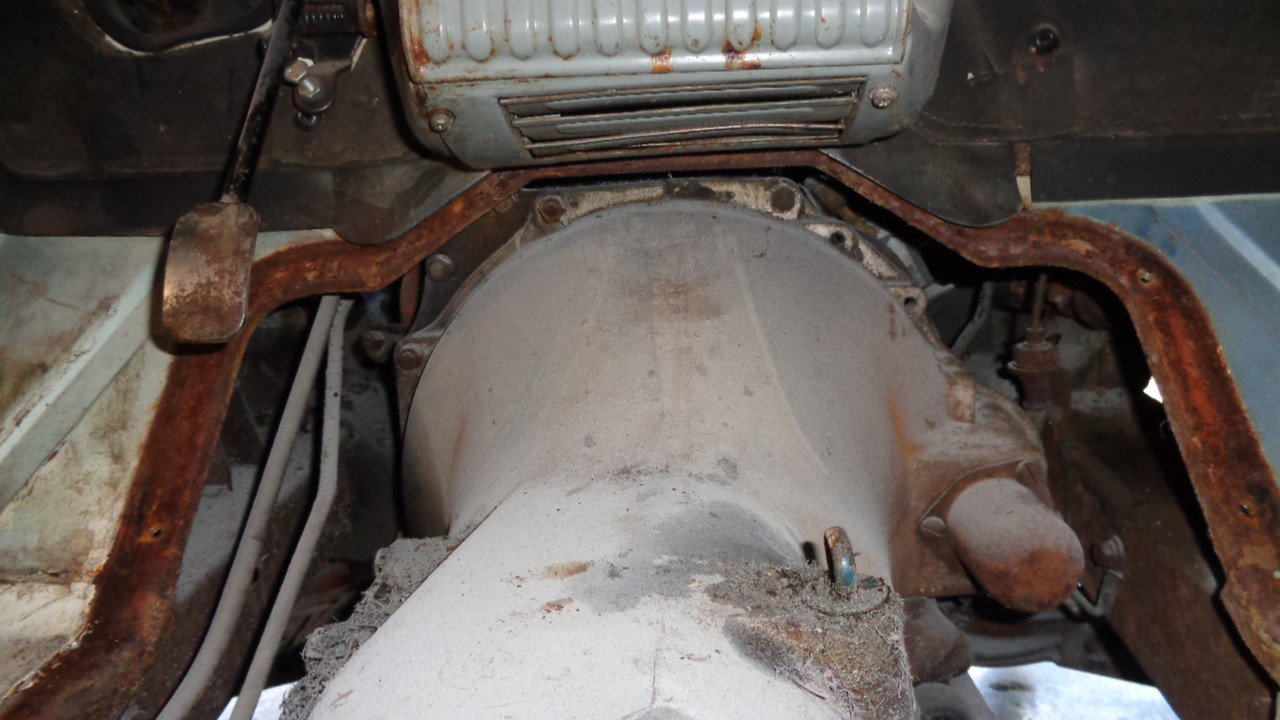
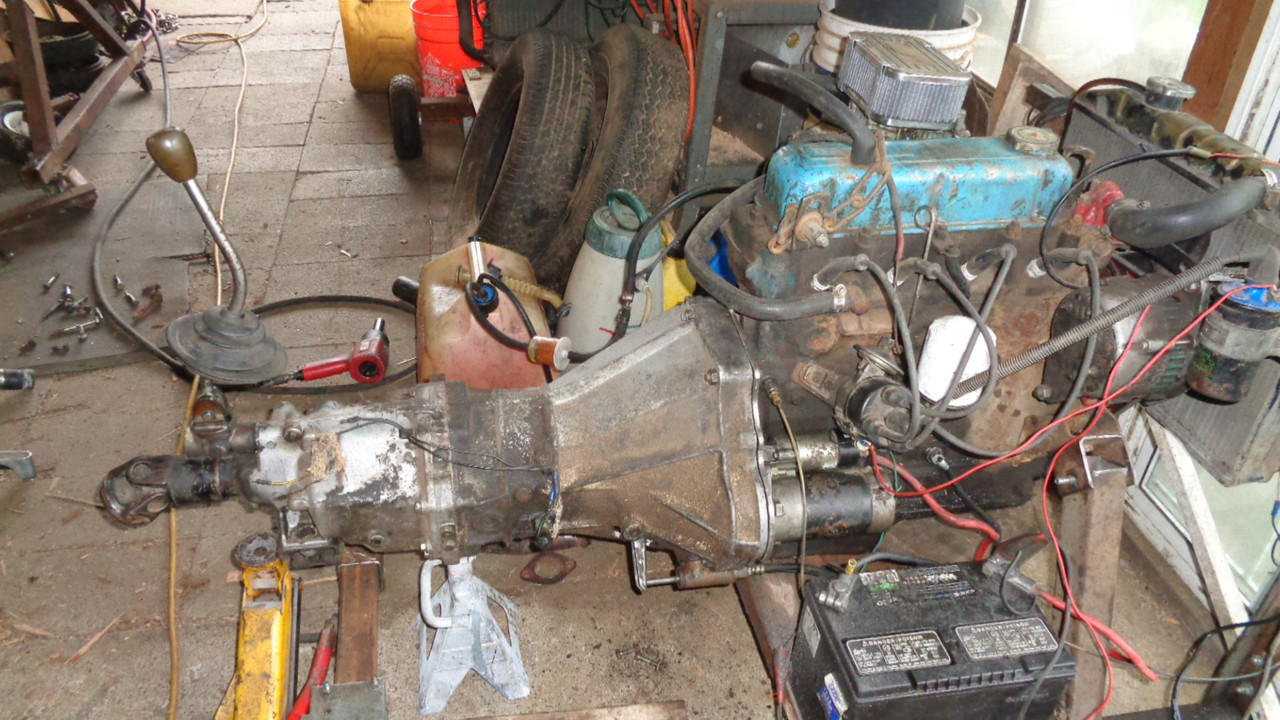
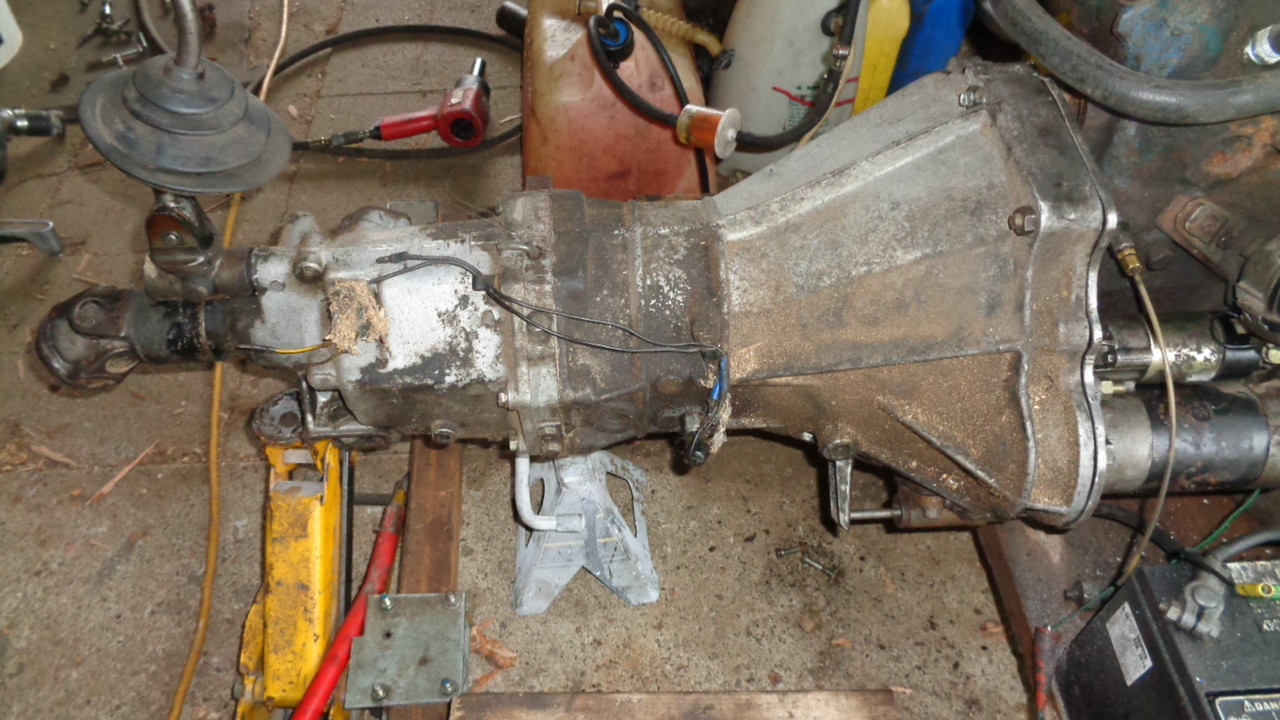
So here it is with a longshaft connected, I have started it and the starter doesn't sound funny so i got the placement correct and the transmission bolts right on, I had to counter sink the starter mount bolts in the plate as the transmission mates to the plate surface where they are, it might be an issue if one has to remove the starter as the bolt could possibly turn, I think if I were to ever sell these plates I would tack the counter sunk bolt heads in place so they would not move, but I would need to look at it a little more, what I did worked fine but the transmission was not connected to the engine when I mounted the starter and test started it, I also ran the engine with the transmission in place and heard no weird noises.

I didn't really think about it till just now, but I aligned the transmission with the engine, I really didn't think about if the engine is tilted in the truck, I just assumed the engine was not tilted like the L and Z blocks.
This should work on a 320 block also, but the J series starter would have to be used, I do not recall what the 320 flywheel looks like right now, if it is different then the J series flywheel would have to be used also, I also have no idea right now if the transmission will fit in the 320 without cutting interior sheet metal(the tunnel).
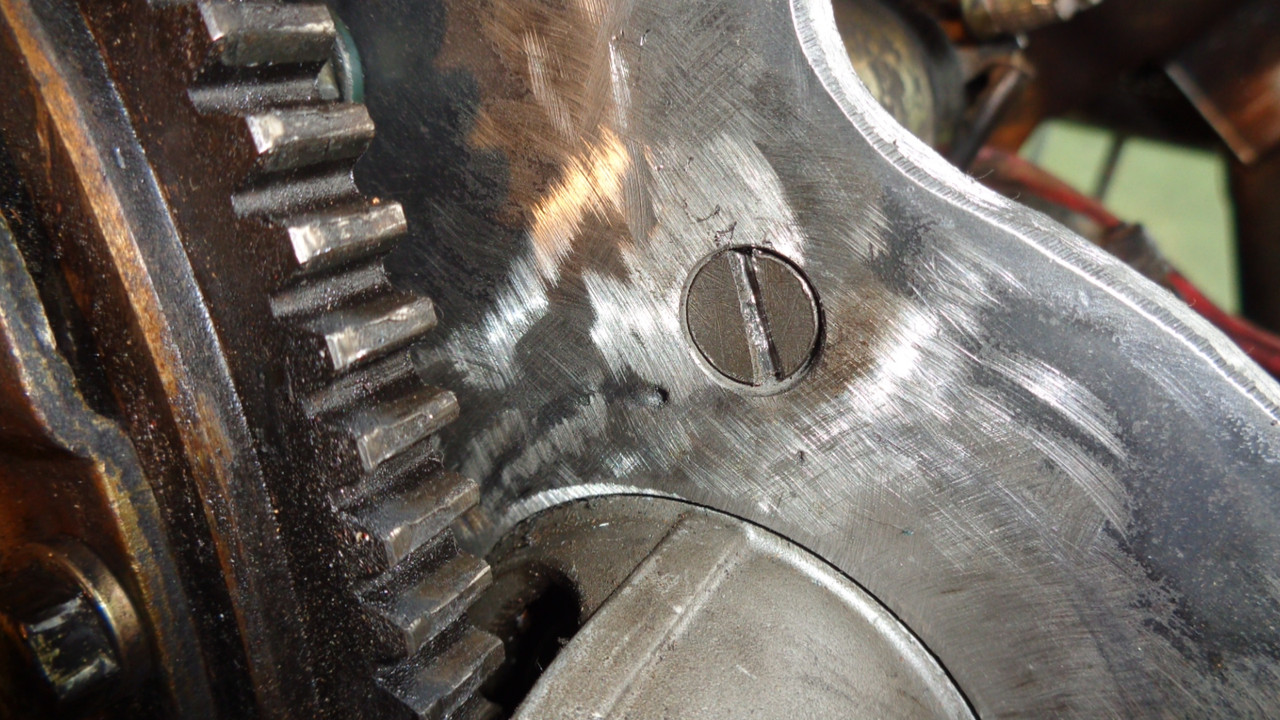
Now I need to clean up all the extra metal around the transmission case and make one more counter sunk bolt for the top left transmission mount, the plate is flush against the back of the block right there.
Re: Around Waynos house
Posted: Fri Apr 12, 2019 6:09 pm
by DRIVEN
Nicely done! If I'm recalling correctly, the J15 in my brother's 520 was straight up. Not sure about 320s.
Re: Around Waynos house
Posted: Fri Apr 12, 2019 9:42 pm
by wayno
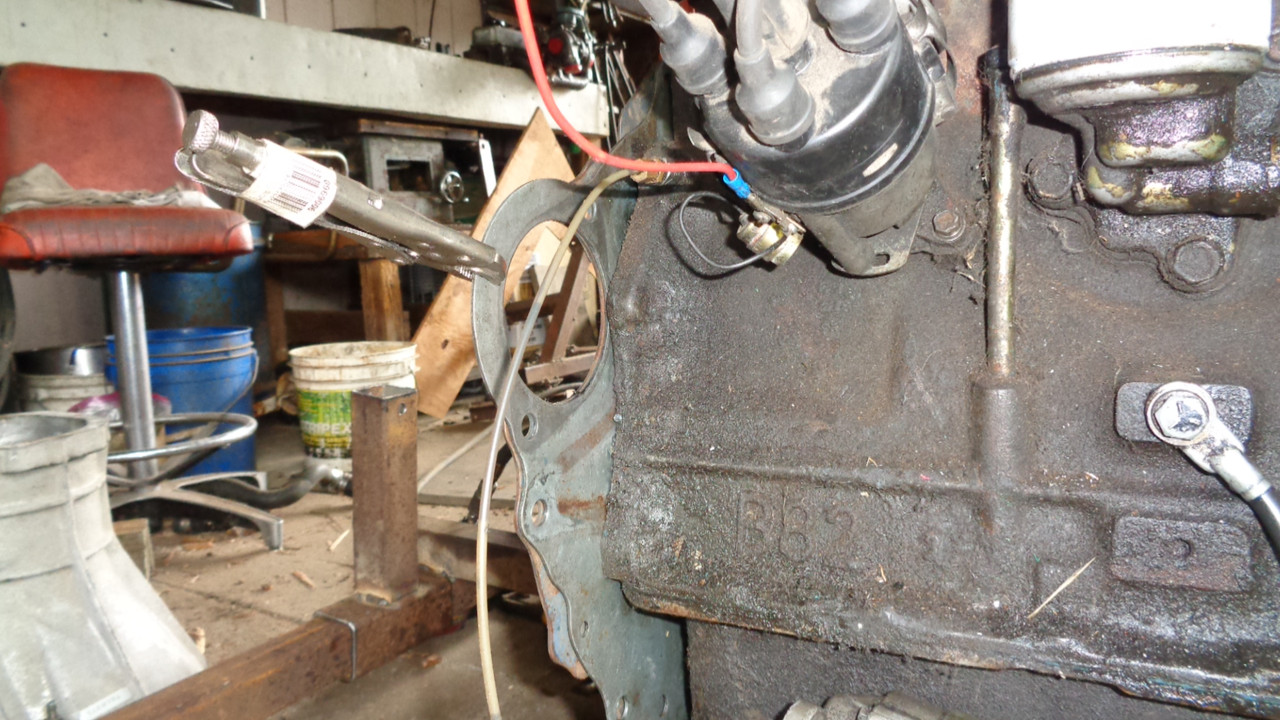
I believe that all the E1 and J13 blocks were straight up and down(not tilted).
I believe a custom drive line will needed as the 4 speed I have is 26 inches long and the short shaft 5 speed is 25 inches long, I suspect the 4 speeds are all that length, but one doesn't know till they do the conversion.
I used 1/4 inch plate to make this adapter plate, the stock plates were 3/16ths plate, I thought thicker would be better, but the engine is still the same engine, it has no more HP, I wonder if it is overkill.
Re: Around Waynos house
Posted: Sat Apr 13, 2019 3:58 pm
by wayno
Re: Around Waynos house
Posted: Sun Apr 14, 2019 7:49 pm
by wayno
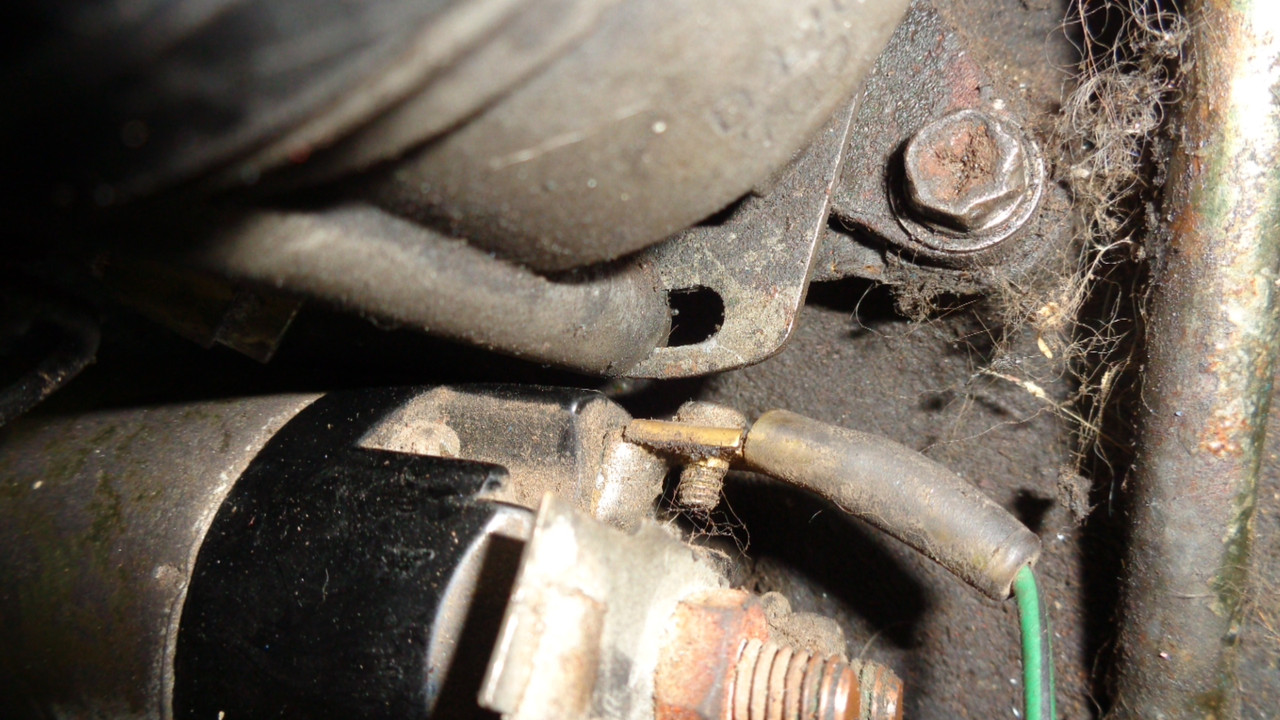
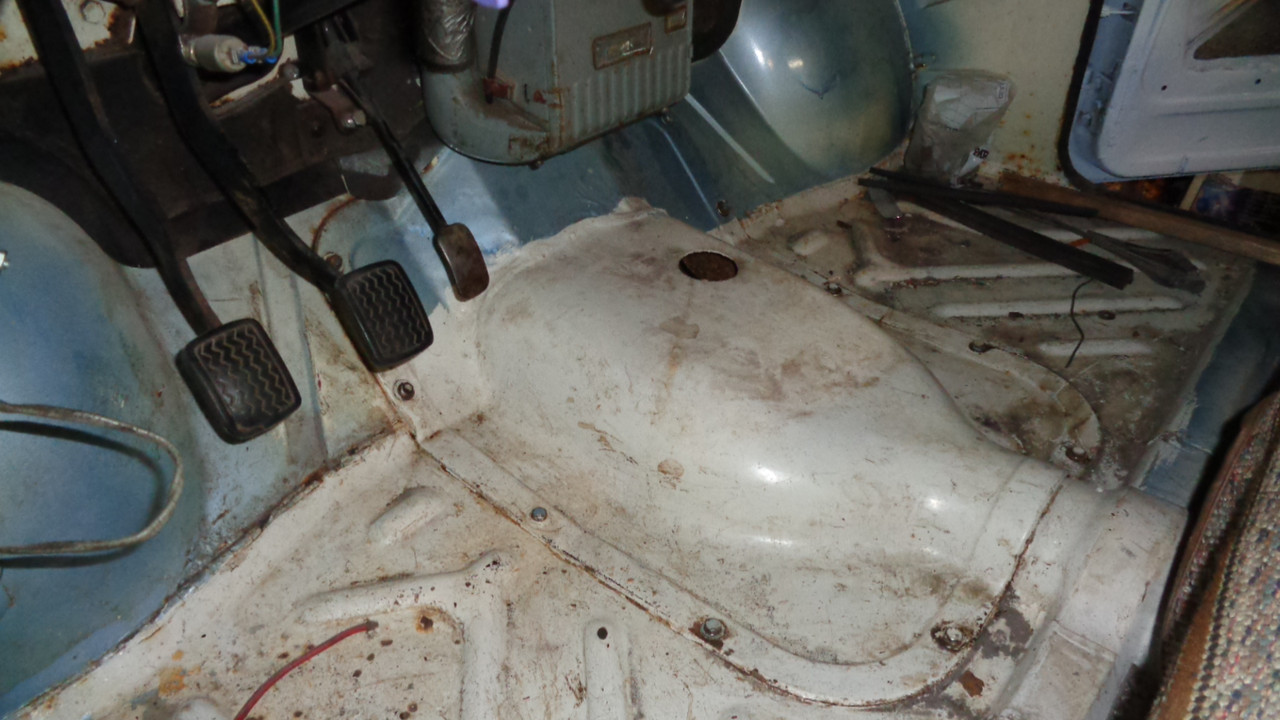
I did some inspecting my work today, it appears the starter solenoid is just barely touching the block where it was hitting before, I checked how much room I have between the starter cone and the inside of the transmission case, less than an eighth inch, I might try welding up the starter mount bolt holes and re-clocking them a 1/16th inch.
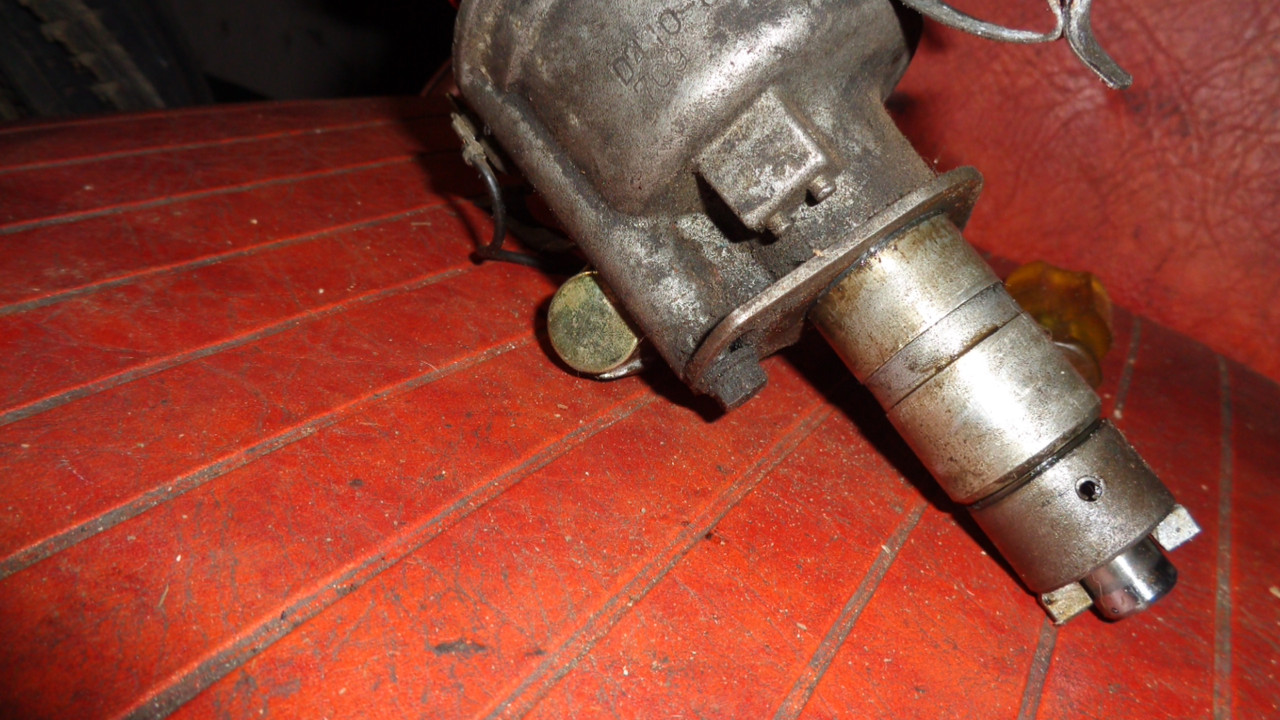
I also have a guy asking about using the napZ case instead of the L block case as the napZ case is what comes on the short shaft 5spd, at first I thought no way, but if the MGB starter is clocked down instead of up like the J series starter then maybe that is possible, but I need a cheap MGB starter with the solenoid on it to see if it will work.
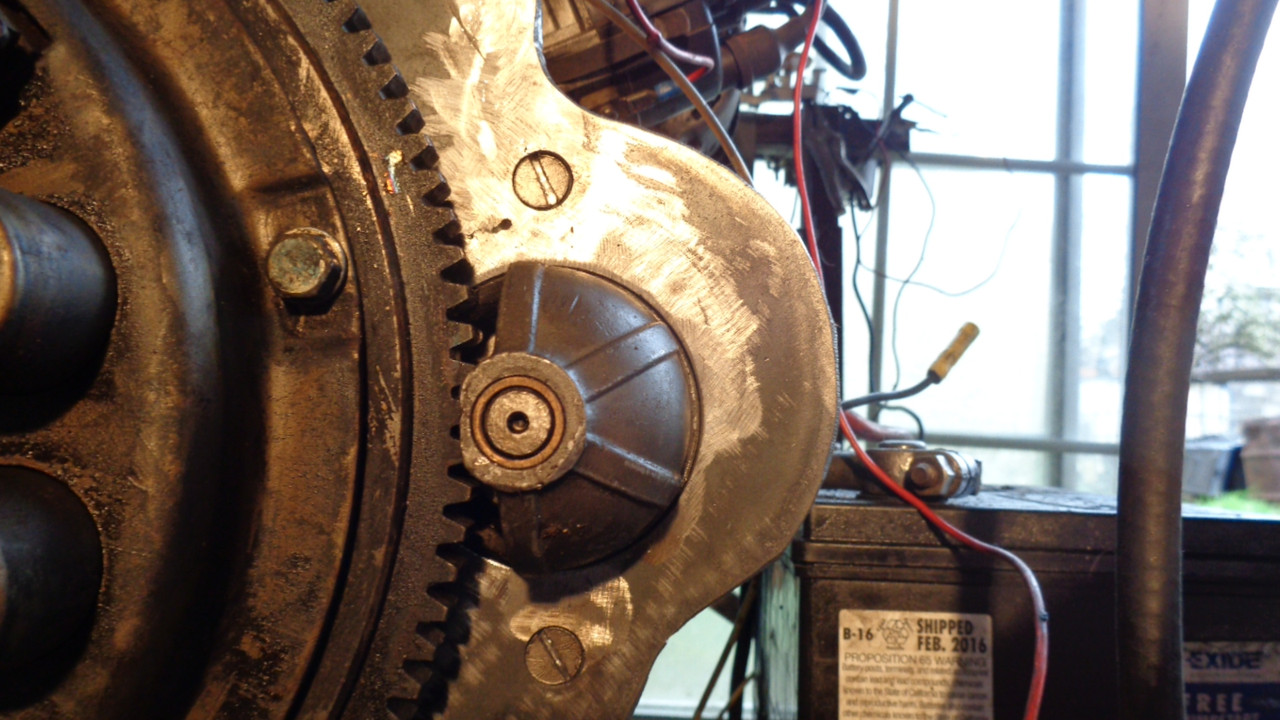
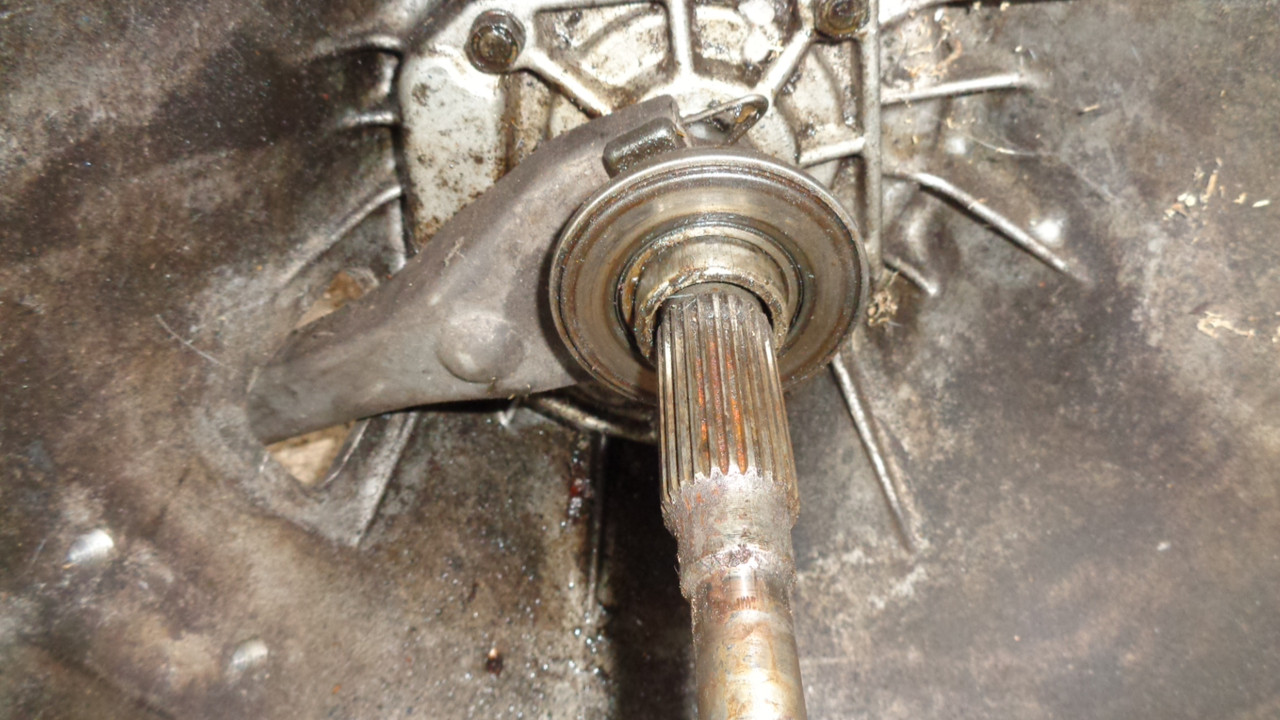
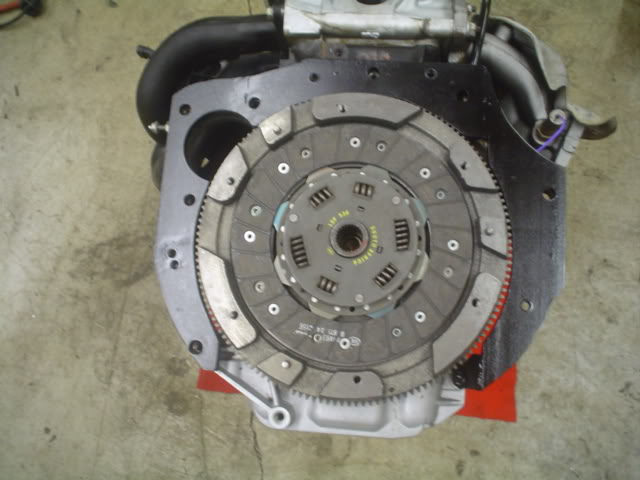
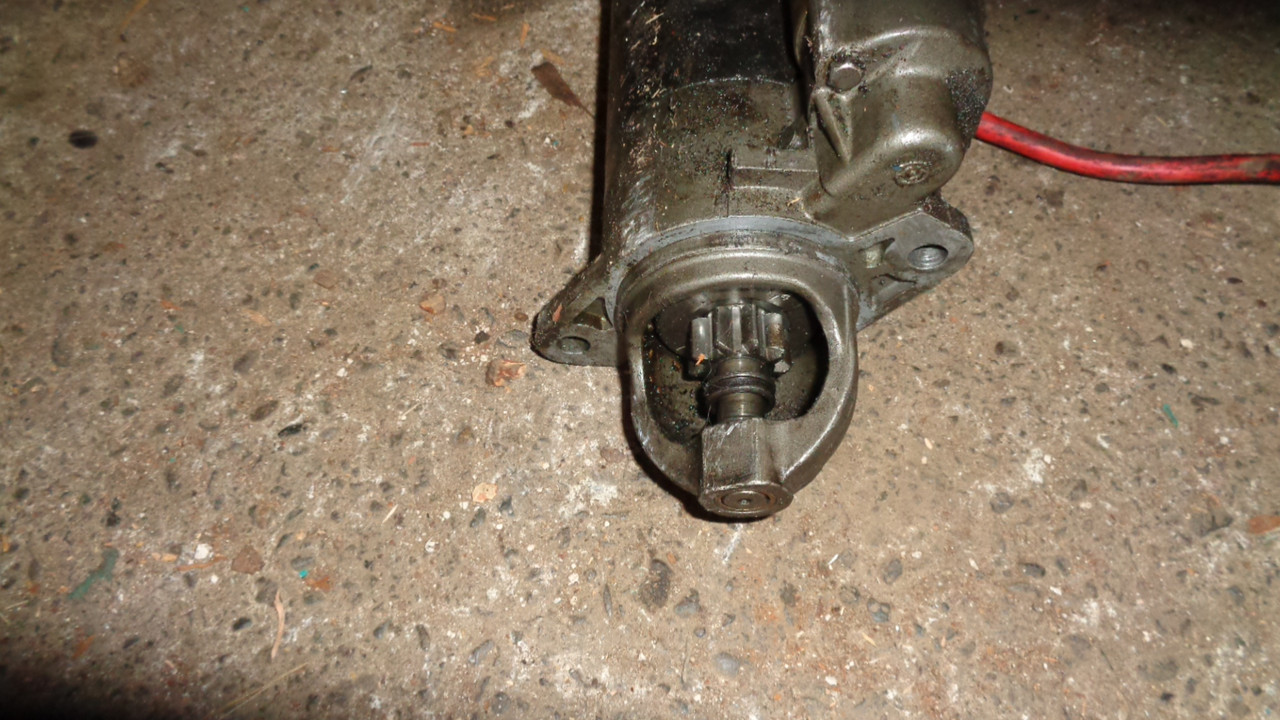
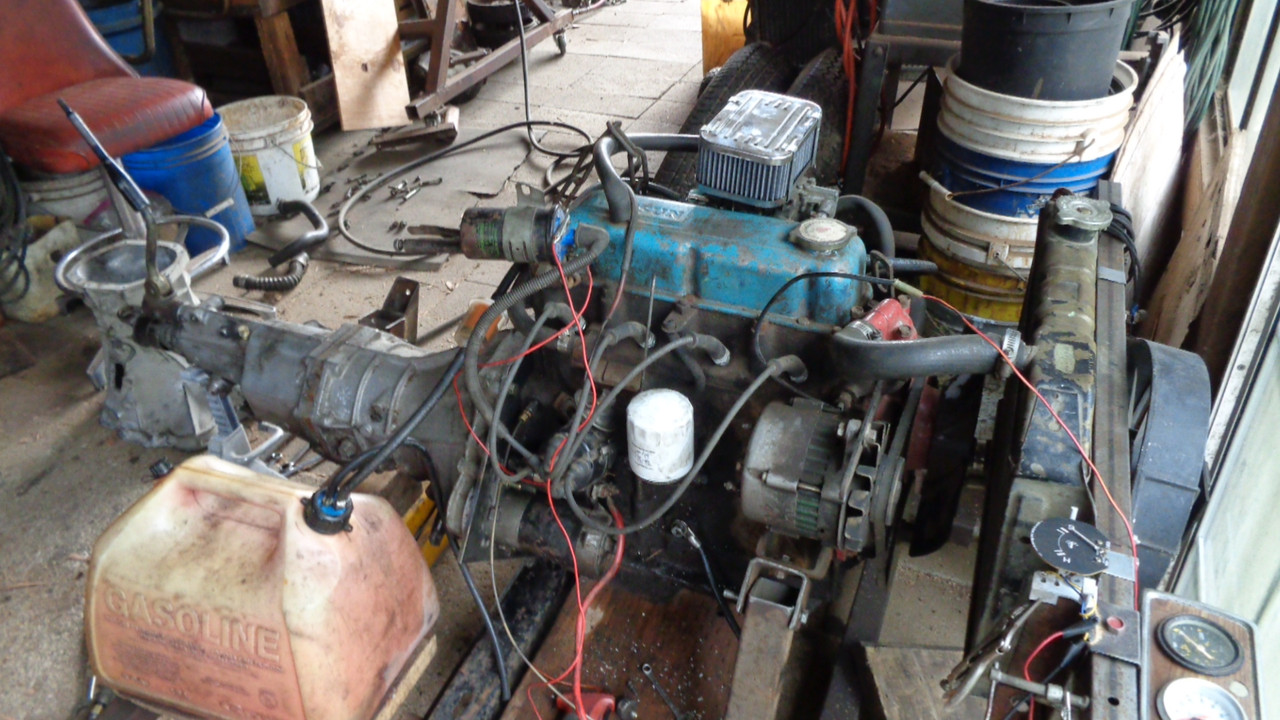
I also tried the 225mm throw out bearing collar again and it is too tall, I need a 240mm collar and I don't have one, I shimmed the pivot ball that the clutch arm rests on and used the stock 720 clutch arm with the stock J series collar/throw out bearing, here is what it looks like.
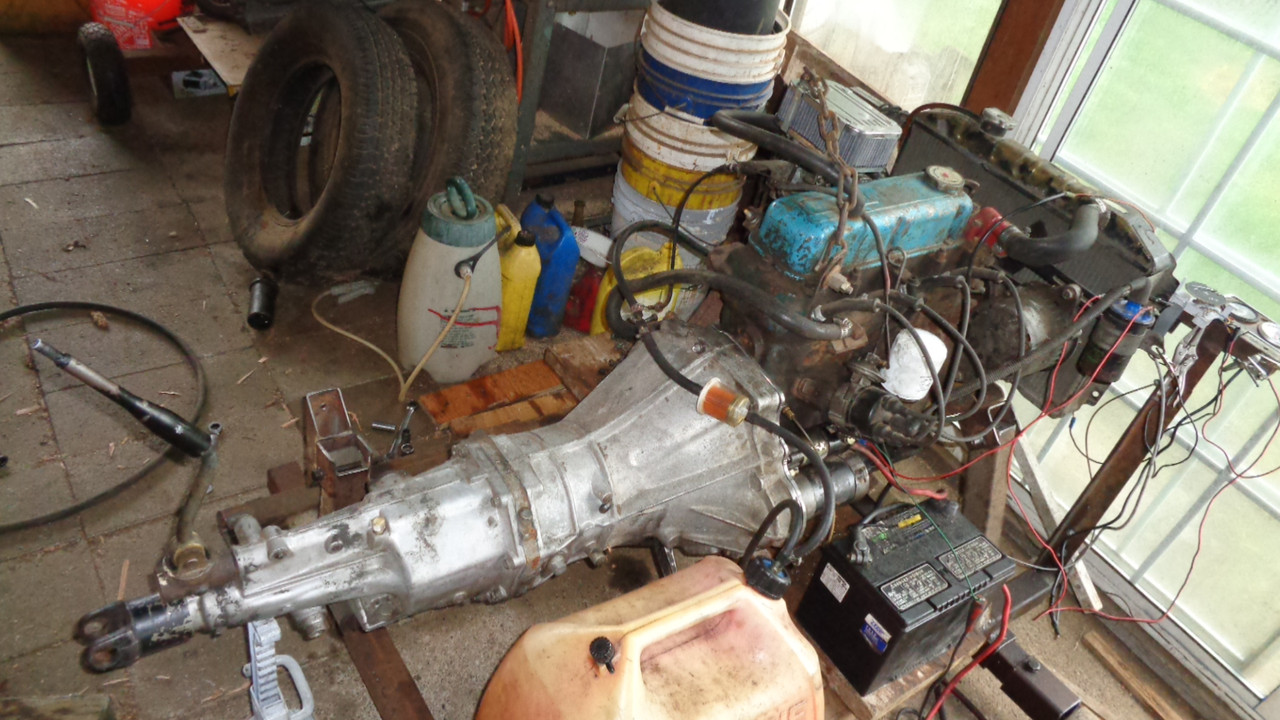
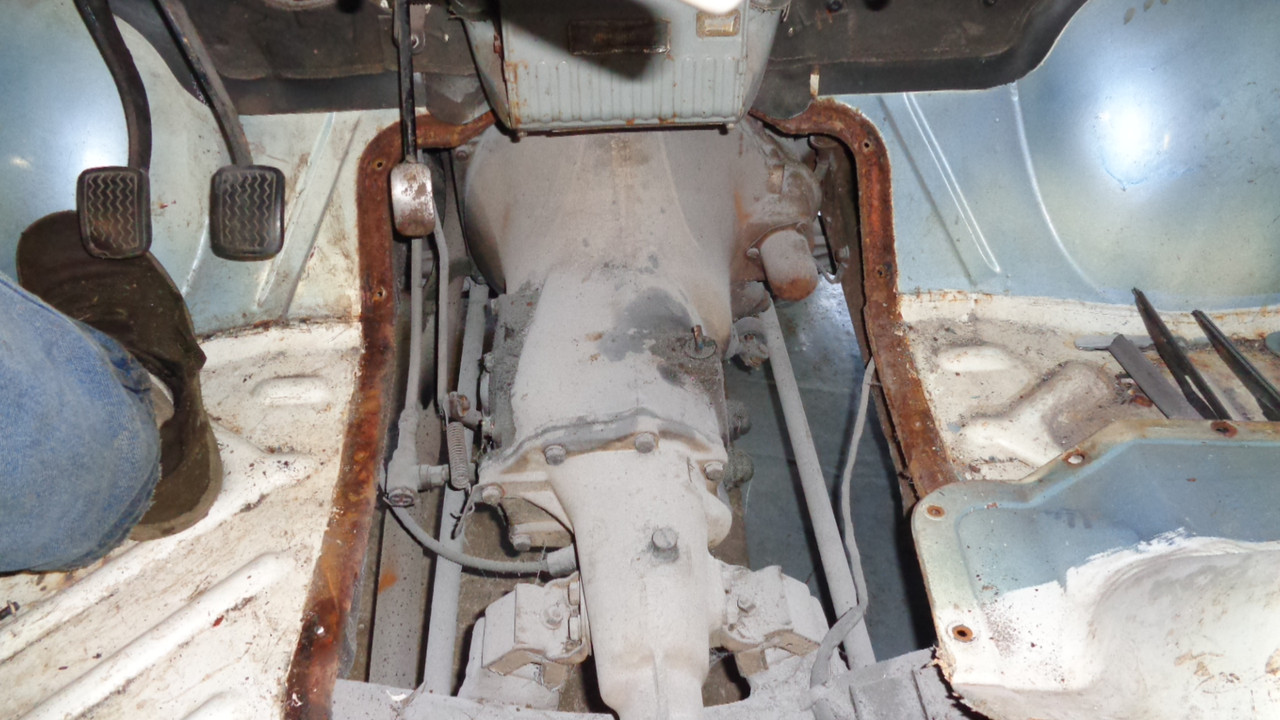
I also installed the short shaft 5spd to make room for my legs in the isle, the long shaft 5spd stuck out a ways.
Re: Around Waynos house
Posted: Tue Apr 16, 2019 5:06 pm
by wayno
I succeeded it clocking the starter a 1/16th inch, no I have just enough space to get a 5 thousands feeler gauge in the space.
I have about a 1/16th inch of space between the starter solenoid and the distributor base, there is only an eighth inch of space total allowing this to work at all with the L case.
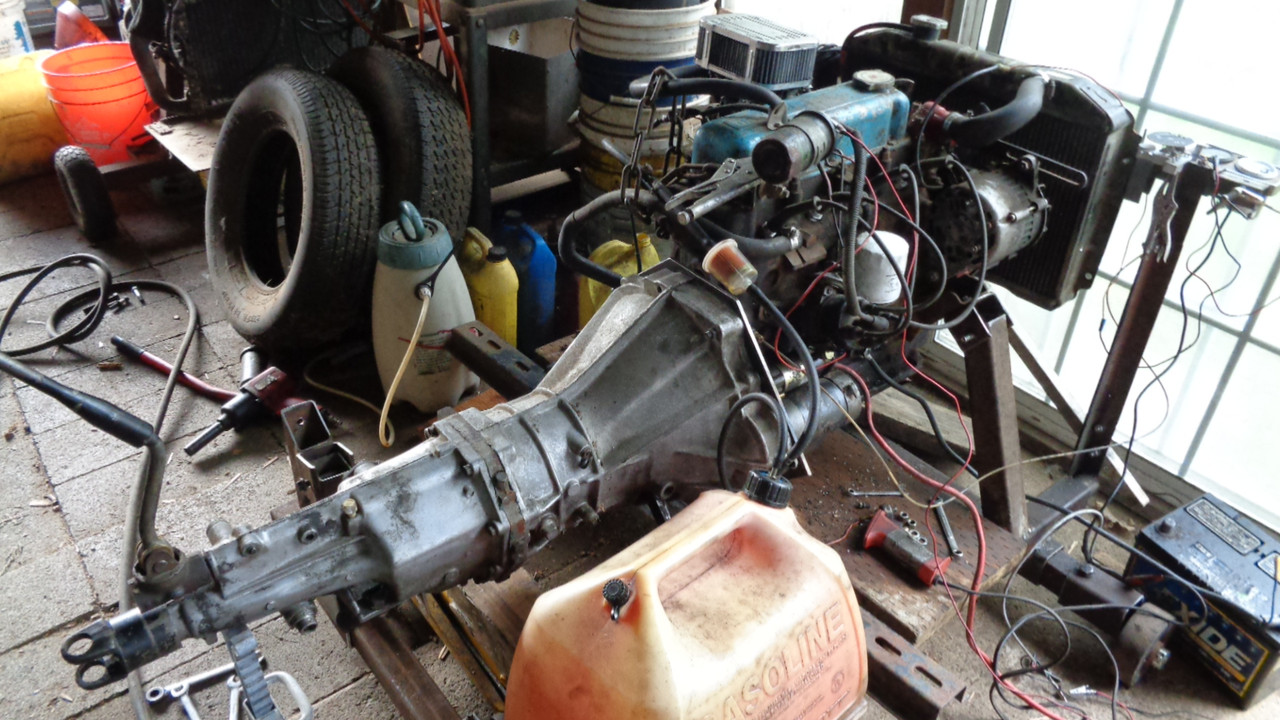
I set up a napZ transmission plate to see if a napZ transmission could be used and I don't believe it is possible, the starter motor itself would be at least a half inch into the distributor itself and the transmission cannot be clocked any differently as the shift lever will be tilted to the passenger side and the transmission mount will be tilted also, this is only going to work with an L block case
Here are a couple photos of the napZ plate in position.

Re: Around Waynos house
Posted: Wed Apr 17, 2019 9:11 pm
by wayno
Re: Around Waynos house
Posted: Thu Apr 18, 2019 2:47 am
by DRIVEN
I think I'd leave that one alone too.
Re: Around Waynos house
Posted: Fri Apr 19, 2019 7:42 am
by Taterhead
Yeah I wouldn’t touch it either.
Re: Around Waynos house
Posted: Sat Apr 20, 2019 10:53 am
by wayno
I opened up the capture things that hold the square nuts in, somehow got the screwed up nuts out without ruining anything, made my own square nuts from scrap 3/16ths sheet metal and got them in the capture things and closed them back up, I then put the tunnel cover back on, all is good.
Re: Around Waynos house
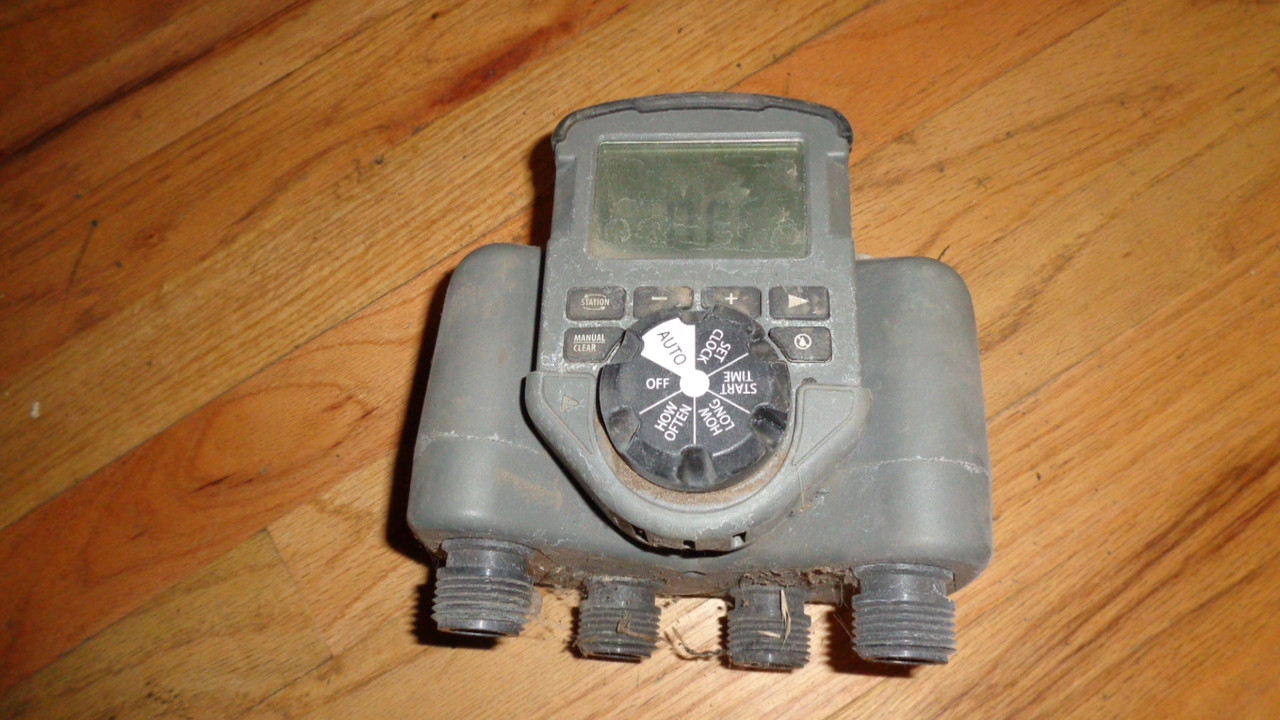
Posted: Fri May 10, 2019 5:44 pm
by wayno
I have been getting my garden in order, instead of using a traditional sprinkler I decided to use all this PCV pipe and fittings I have stored from when I had a fish room, I have had to buy very little to get where I am.
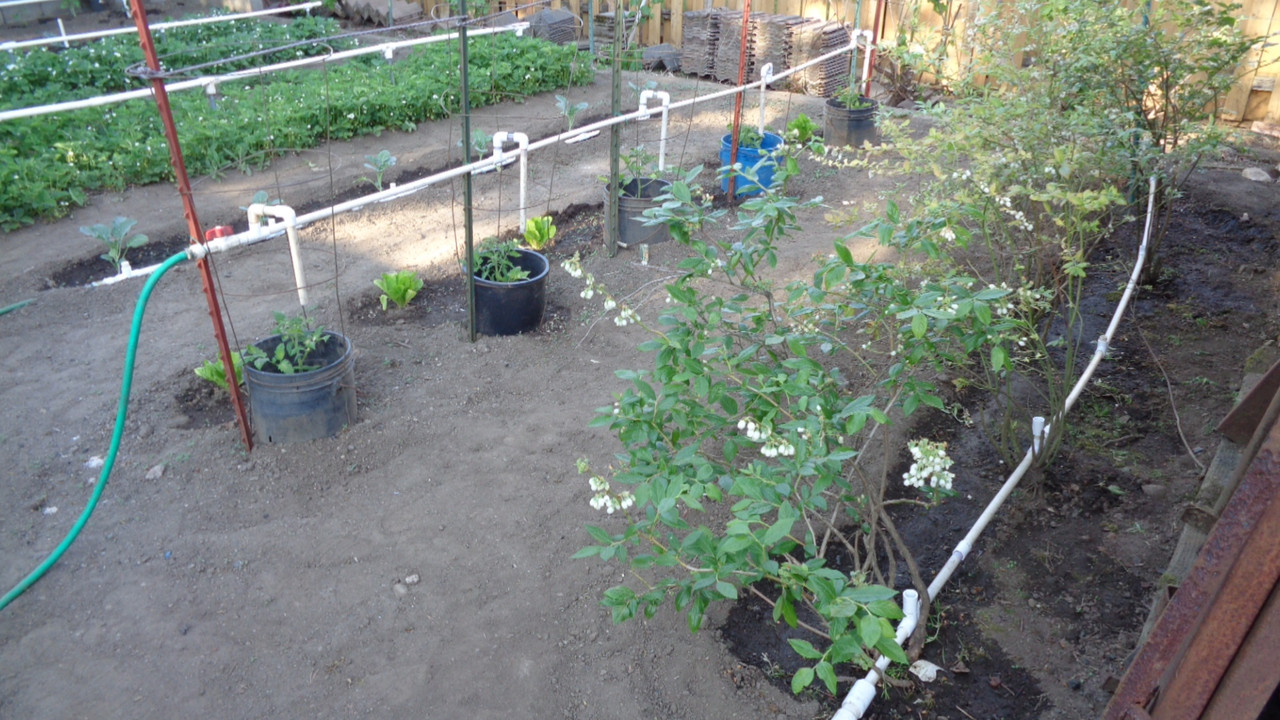
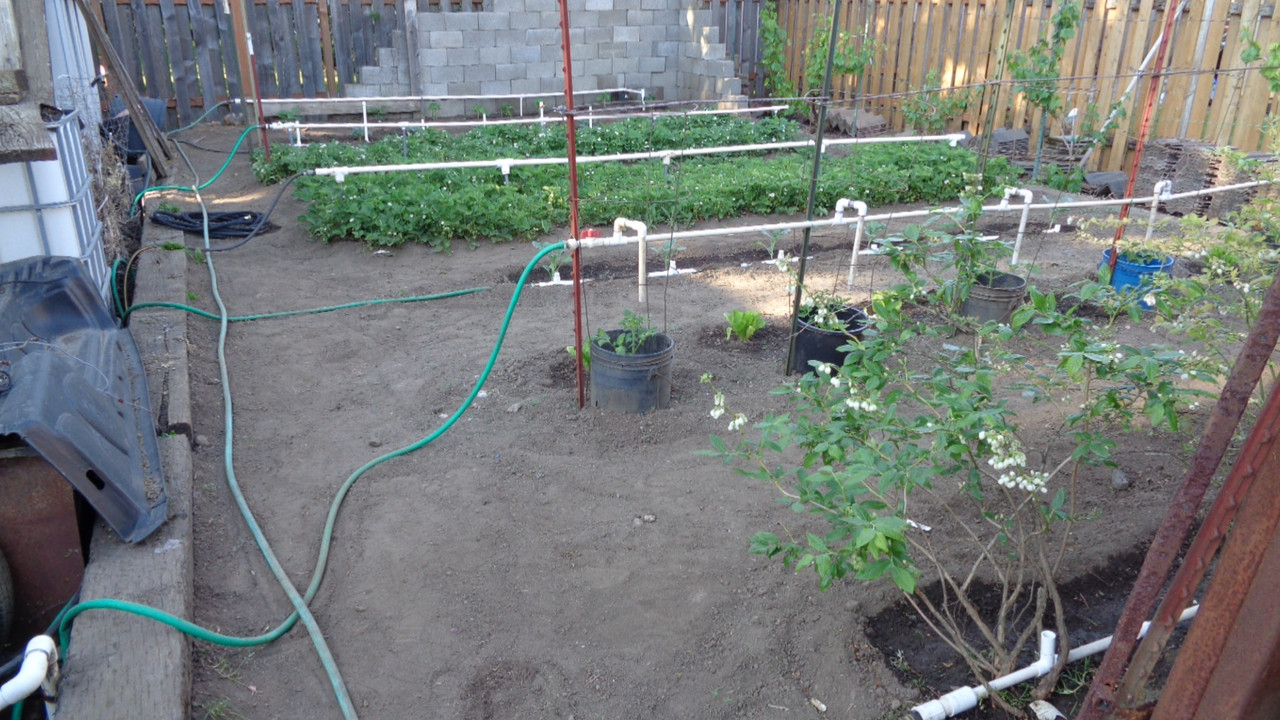

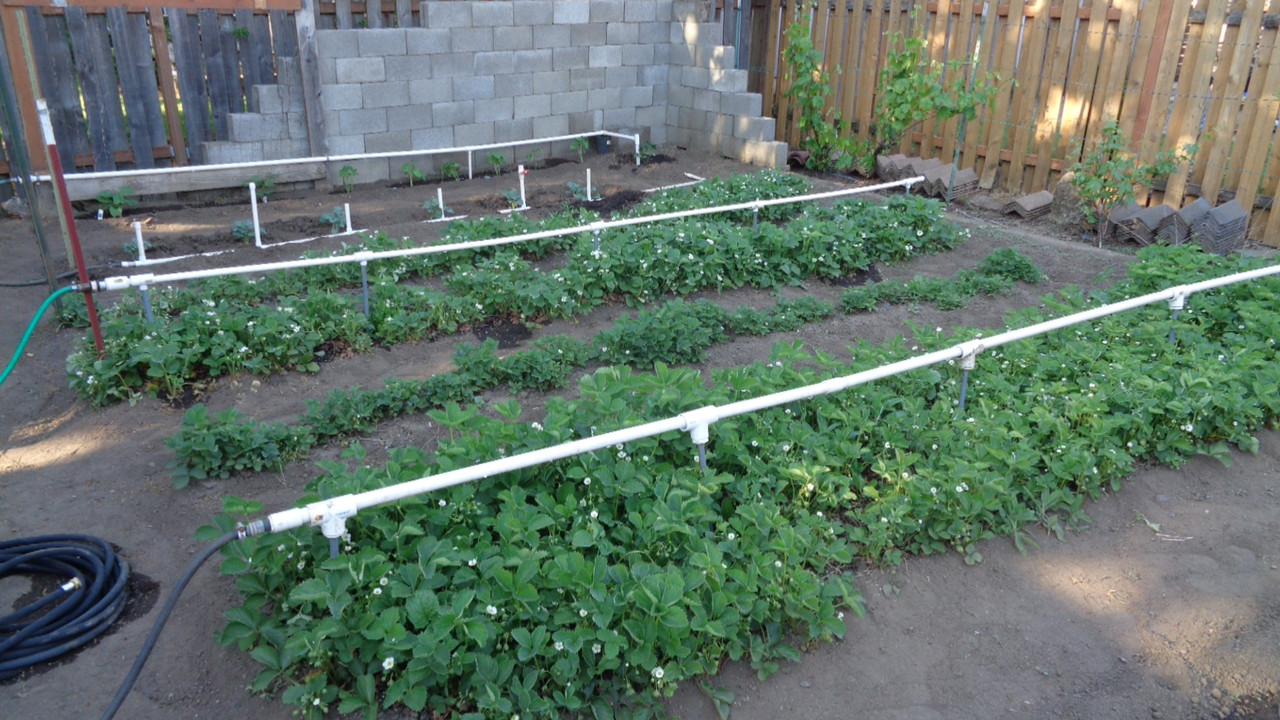
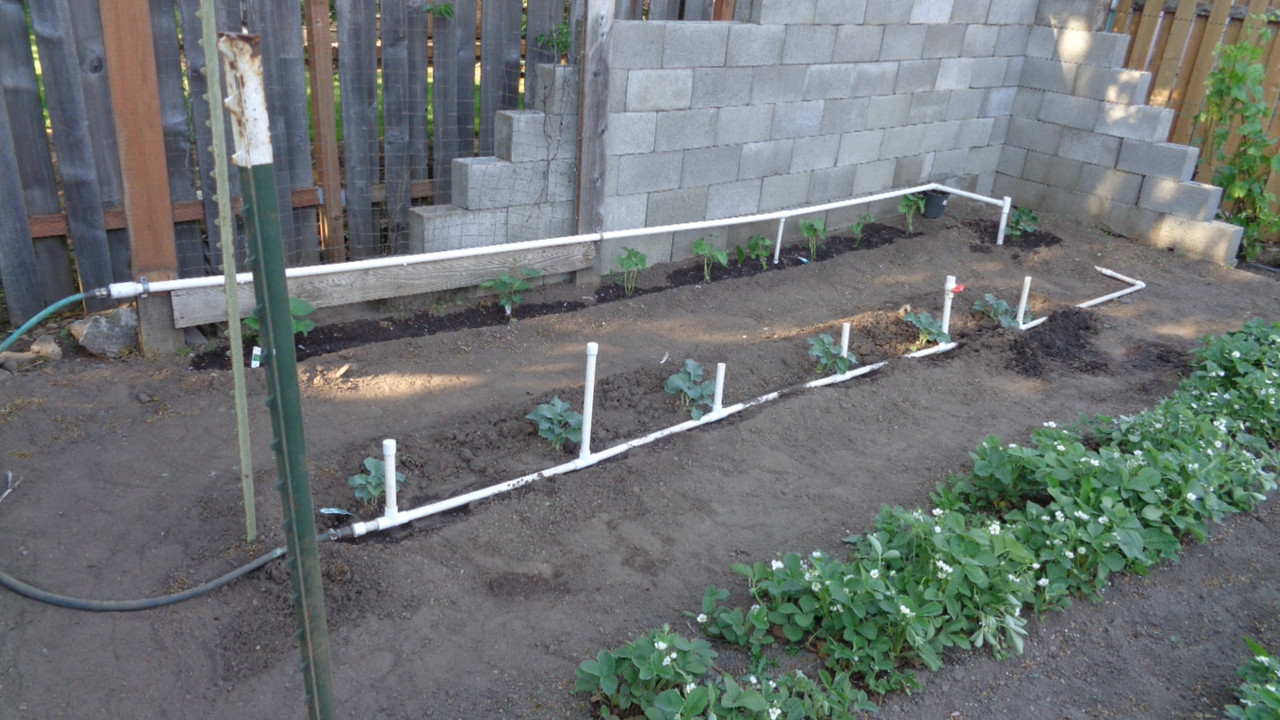
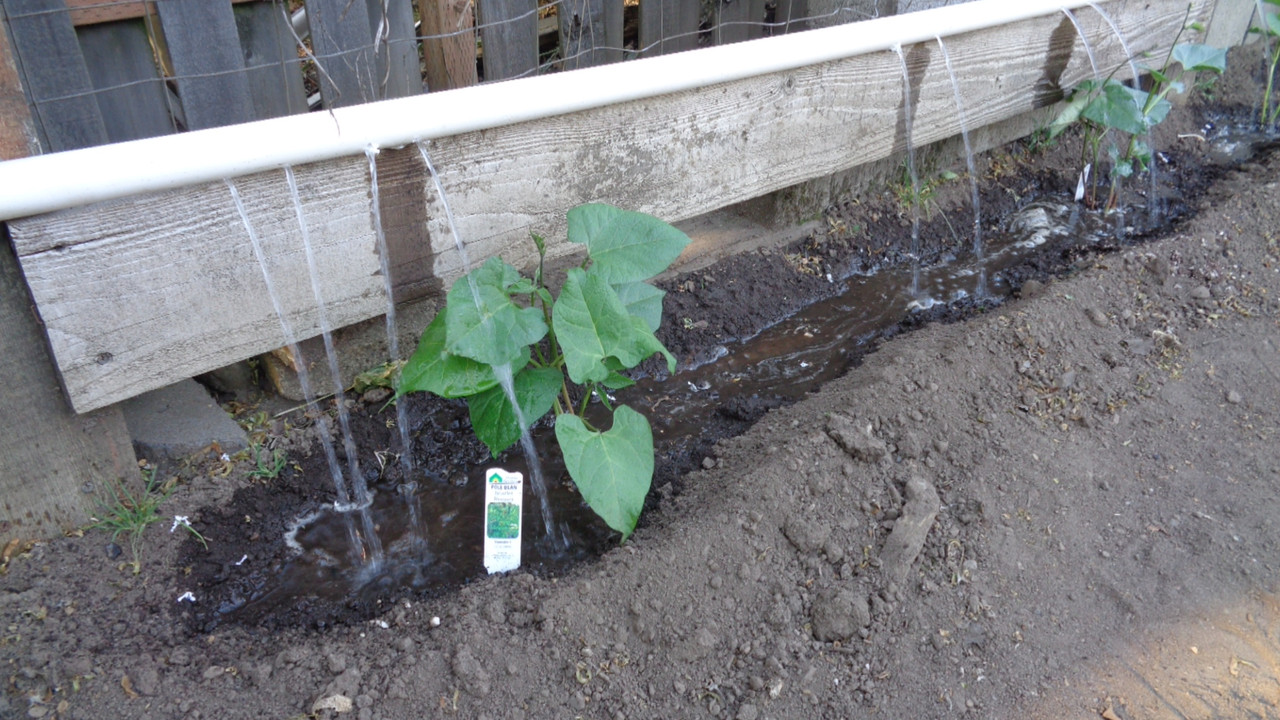
The pipes on the ground I point the fittings up and then use short pieces of pipe to make all the fittings pour water out at the same rate or I put a cap on the top and drill holes in the upright.
The pipes that are suspended in the air have holes drilled in the pipe to spread out the water evenly, all of this is controlled by the height of the pipe exit, the tomato plants have holes in the side of the buckets so the Romaine lettuce get watered at the same time.
I am doing it this way so between the rows don't get watered, maybe the weeds won't grow as bad so I won't have to use the rototiller so often, I still have two rows of strawberries to pipe, likely they will get done tomorrow.
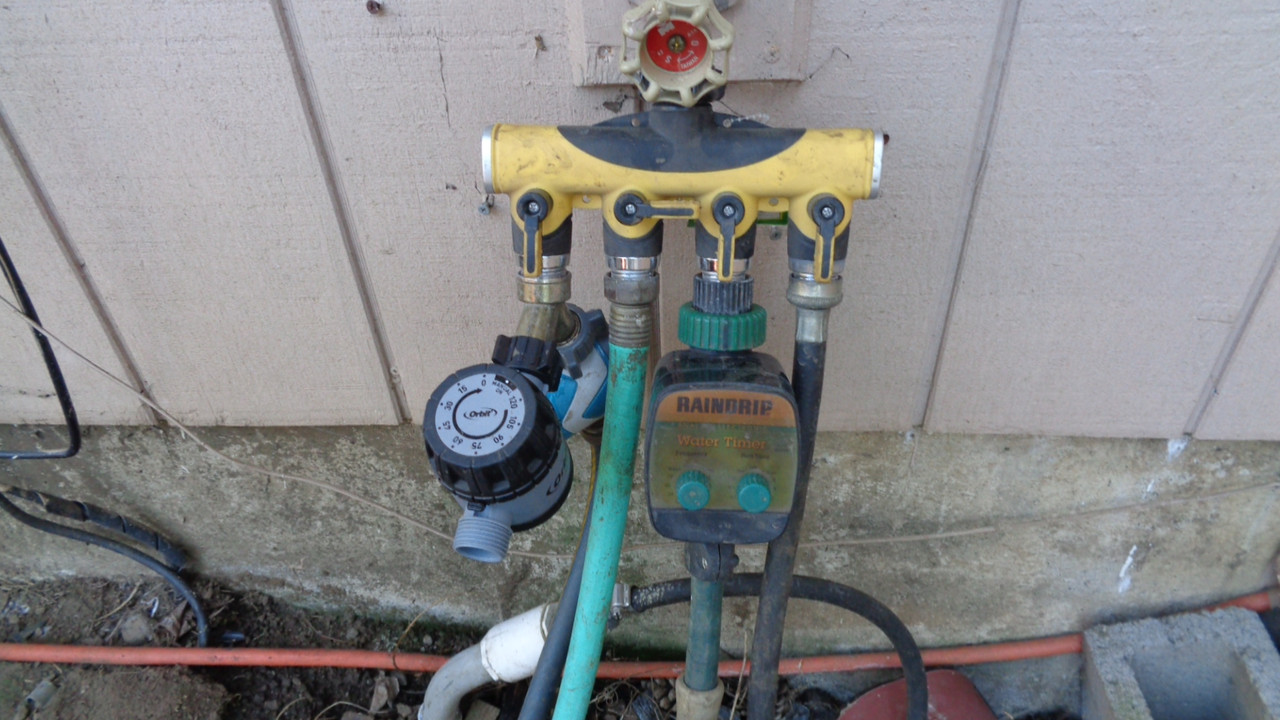
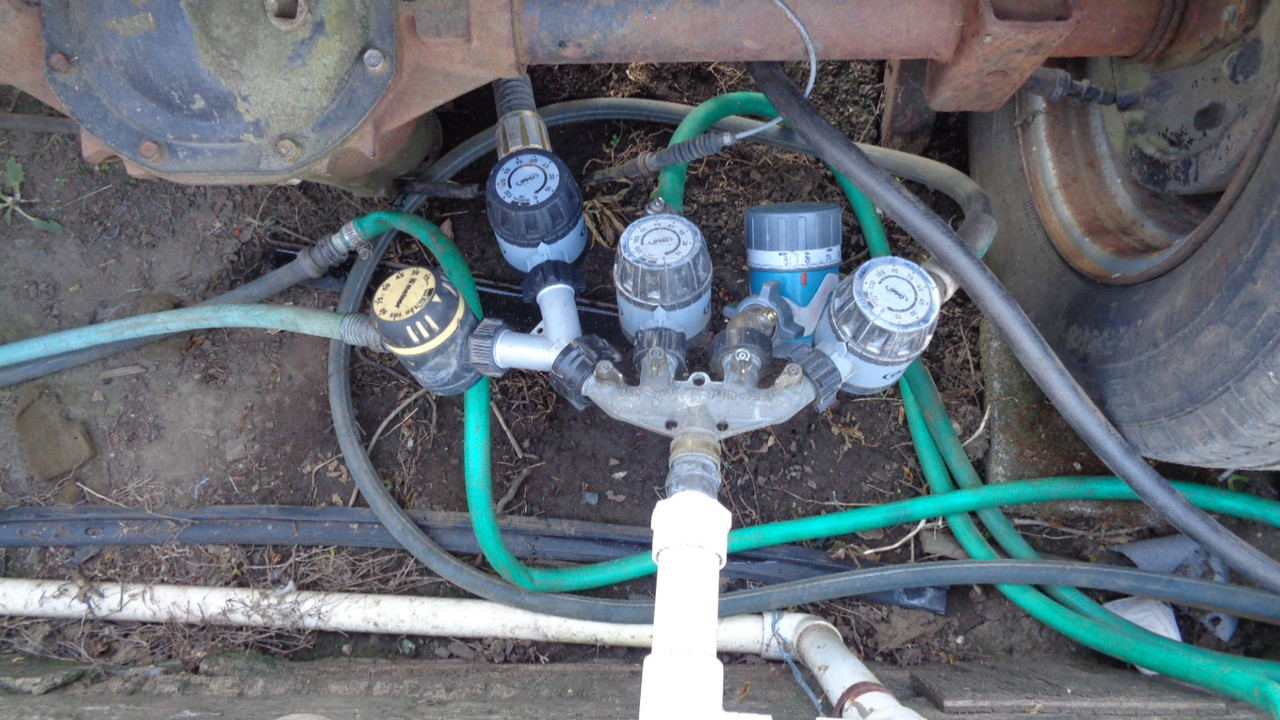
I am using manual watering timers except for three that are automatic, most of the watering gets done in each row in a couple minutes.
Here are a couple photos of watering.

I have this timer, I have tried for years to make it work properly but have given up, either one outlet works like it should or all 4 outlets open at the same time, I cannot seem to figure out how to make it water 4 different sections at different times.